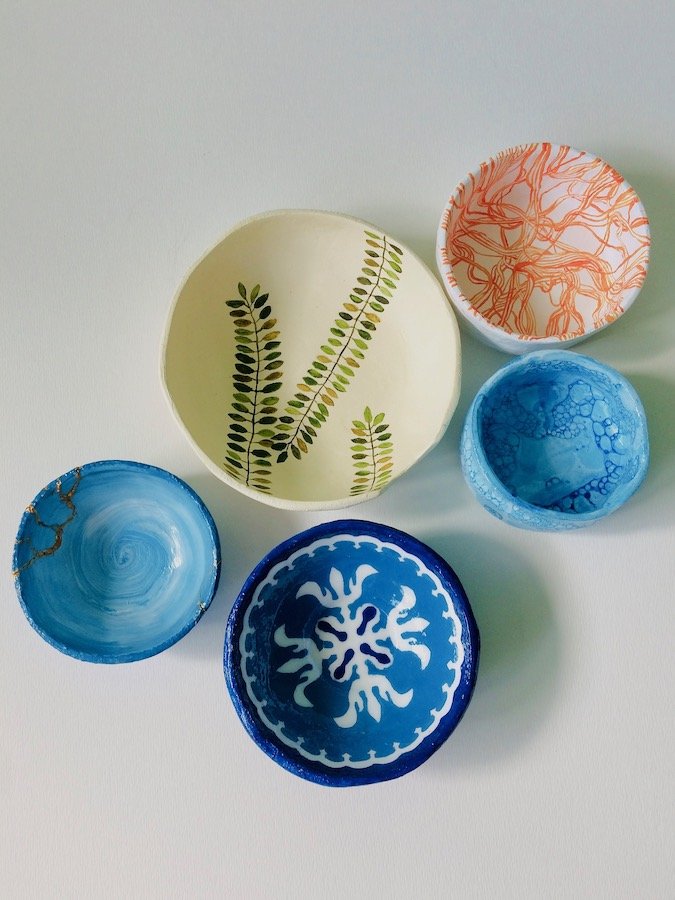
These bowls are the perfect gift. Fun to make, practical too, their useful stationary holders, key dishes, sweet displays and more. Declutter your worktops with these stylish eye-catching bowls.
Level of difficulty: Easy-medium
Materials:
- 1kg white air-dry clay
- Acrylic paint
- Water
- Polyurethane gloss/matt varnish
If you don’t use white clay, you’ll need to undercoat the clay (once dry) in either white primer or acrylic.
Tools:
- Rolling pin
- Cling film
- Paintbrushes
- Craft knife
- Bowl
- Sandpaper
- Paper
- Pencil
Method:
When shaping, always keep your clay moist by sprinkling on a bit of water.
- Choose an existing bowl you like the shape and size of. You’ll be using this as your “template”.
- Decide if you want to copy the inside or outside of the bowl, and cover this side with cling film. Leave a little extra cling film to help you pull the clay out later.
- Roll out the air-dry clay to a thickness of 3-4mm and bigger than the chosen “template” you’ll be using.
- Next place the clay on the side of the template you’re copying (inside or outside) and across the cling film. Smooth around the template and cut-off any excess.
- If you’re wanting a scoop on the rim of the bowl e.g. to lay chopsticks, paintbrush, pen etc against – then cut out a small semi-circle along the rim, preferably the size of a large coin
- Leave the clay to set, I suggest half a day so as to not let it dry out before removing the bowl. Using the edges of the cling film, pull your air-dry clay away from the template. This is because if it completely sets, you find it hard to get off.
- Leave the clay to dry another half a day, then peel off the cling film as this will only trap the moisture in. Leave to dry 1-2 days.
- Once dry, sand off any bumps or smooth out any scratches, by either rubbing in a small amount of clay, or using fine sandpaper. Should you use a small amount of clay to fill in any scratches etc, make sure you leave it to dry for about a day.
- Sand down and brush off any clay dust.
- Apply 2 layers of white paint to the entire bowl. This will act as a primer, and cover any additional patches of clay you may have used in step 6.
BLUE AND WHITE TEMPLATE BOWL:
You’ll Need:
- Paper
- Scissors
- Paper
- Pencil
- Acrylic paint
- Paintbrush
- Gloss varnish
Method:
- Take your clay bowl and turn it upside down; draw around its rim to form a circle.
- Within this circle, design the pattern you want for the inside of the bowl, then cut the template out to form a stencil.
(Tip: Before designing your template cut the circle out and fold it into four quarters. Within this quarter – draw your design and then cut around it. When unfolding the paper, there should now be a complete template that will lie within the bowl and act as a stencil)
- Draw around the template onto the bowl – this will provide an outline for you to paint within.
- A more striking design can be created if you choose no more than three colours and alternate between them.
- Leave the paint to dry.
- Turn the bowl over, and selecting one of the colours used earlier, paint the outside. You’ll need to do several coats.
- Leave to dry for a few days – then varnish in gloss. Done!

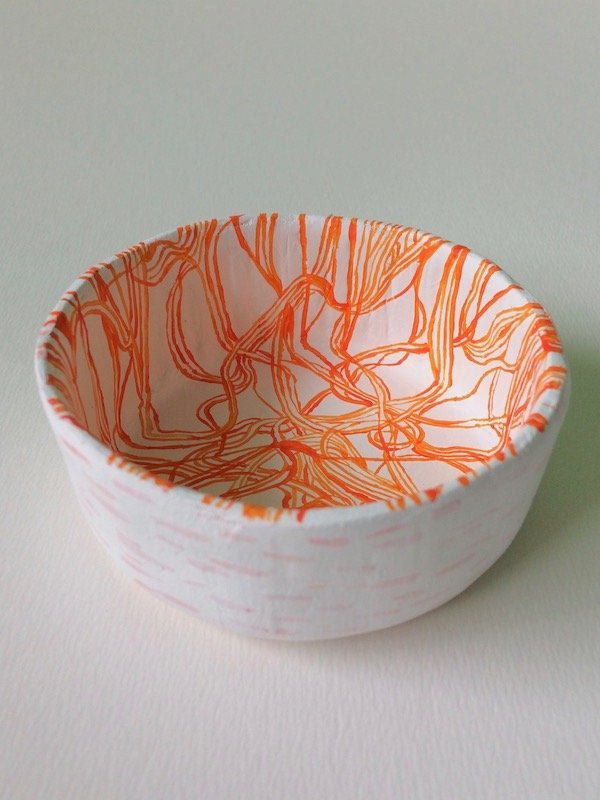
ABSTRACT “STRING” BOWL:
You’ll Need:
- A thin-ended paintbrush
- Acrylic paint
- Water
- Matt varnish
Method:
- Starting from the inside of the bowl, paint several lines (of the same colour) that swirl and cross over one another. Make sure to go right up to the rim, but never over it.
- Make sure to vary the thickness of the lines.
- Where some of the lines cross over to make a completed shape of sorts, fill this shape with further lines, but make sure to leave some plain:

Once you’ve completed all your lines, leave to dry.
- Turning over, draw horizontal dashes that wrap around the outside of the bowl. But try not to create a perfect line around it – think sprinkles of rain.
- Once the outside has dried, create a paint wash of 1:3 paint to water, here I used white paint, so as to see the dashes more clearly. Apply the wash over the outside of the bowl only – allowing you to still see the dashes below – and to create a contrast in brightness to the lines inside the bowl.
- Varnish, matt looks best.
BLUE BUBBLE BOWL:
You’ll Need:
- A straw
- Washing-up liquid
- A pot
- Acrylic paint
- Water
- Gloss varnish
Method:
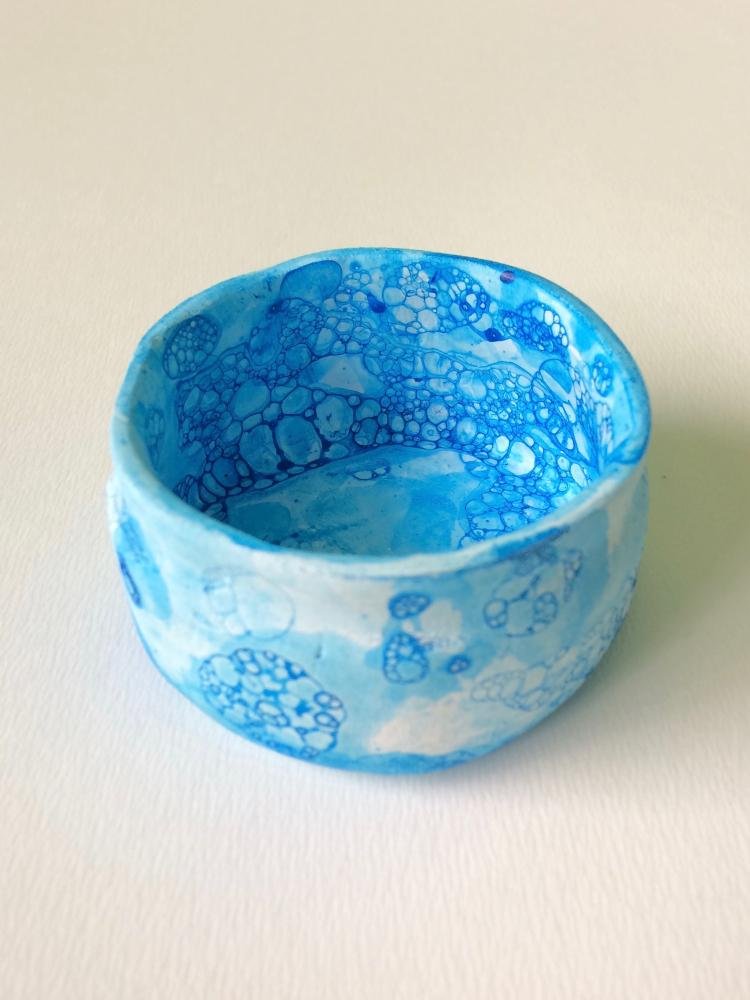
- In a plastic pot mix your chosen paint with water to a ratio of 1:2, and add a few drops of washing-up liquid.
- Taking a straw, blow directly into the liquid mix – thereby creating bubbles.
- From here dip the outside of the bowl into the bubbles, but be careful not to touch the liquid surface – as this will only create a plain wash to the bowl.
Note: larger bubbles have less definition and are paler, while the smaller bubbles are more defined, but run the risk of being closer to the liquid’s surface.
- To do the inside of the bowl – you’ll need to gently scoop out some of the bubbles and place these on the inside – leave to pop on their own and dry.
- Once completely dry, gloss varnish.
FERN-LEAF BOWL:
You’ll need:
- Acrylic paint
- Paintbrush
Method:
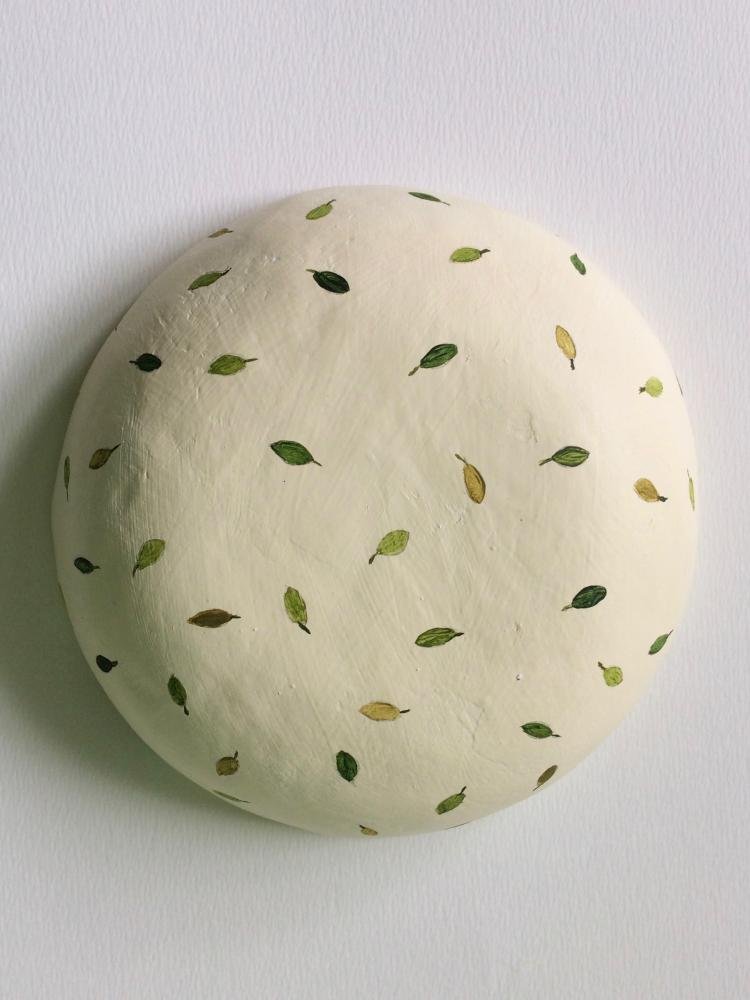
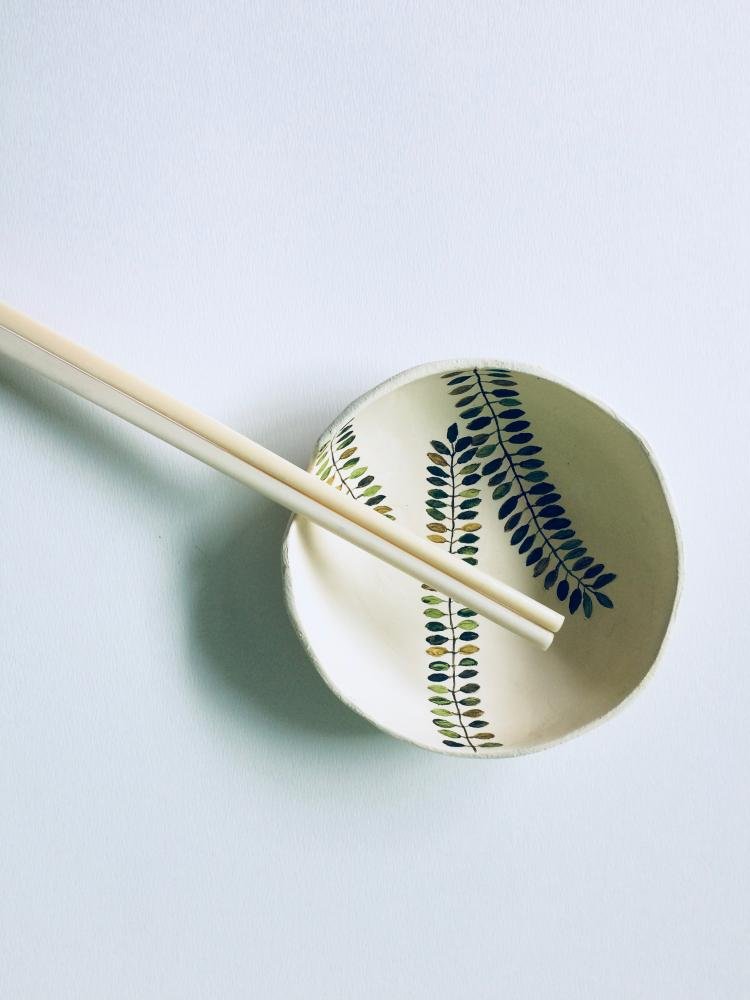
- Apply a light cream paint as the base colour, and cover the entire bowl.
- Next, starting from the inside edge of the bowl, draw 2-4 lines (at different lengths). These will be the ferns’ stems. Try not to have perfectly straight lines.
- A little way up each line and away from the rim, draw mini ovals along the stem, and with a slight point at both ends – these will be the fern’s leaves. Then draw a line connecting the leaves to the stems.
- Prepare 5-6 different shades of green for the leaves – apply these shades randomly; with some grouped together, and others individually apart.
- However, use just one shade of green when painting the thin line that joins the leaf to the stem, and for the stem itself.
- Once the inside of the bowl is dry, turn over and paint a few dozen smaller leaves around the base, almost as if they’ve fallen of the stem. Again, paint these leaves various shades of green.
- Set aside to dry.
- Varnish, with either matt or gloss.

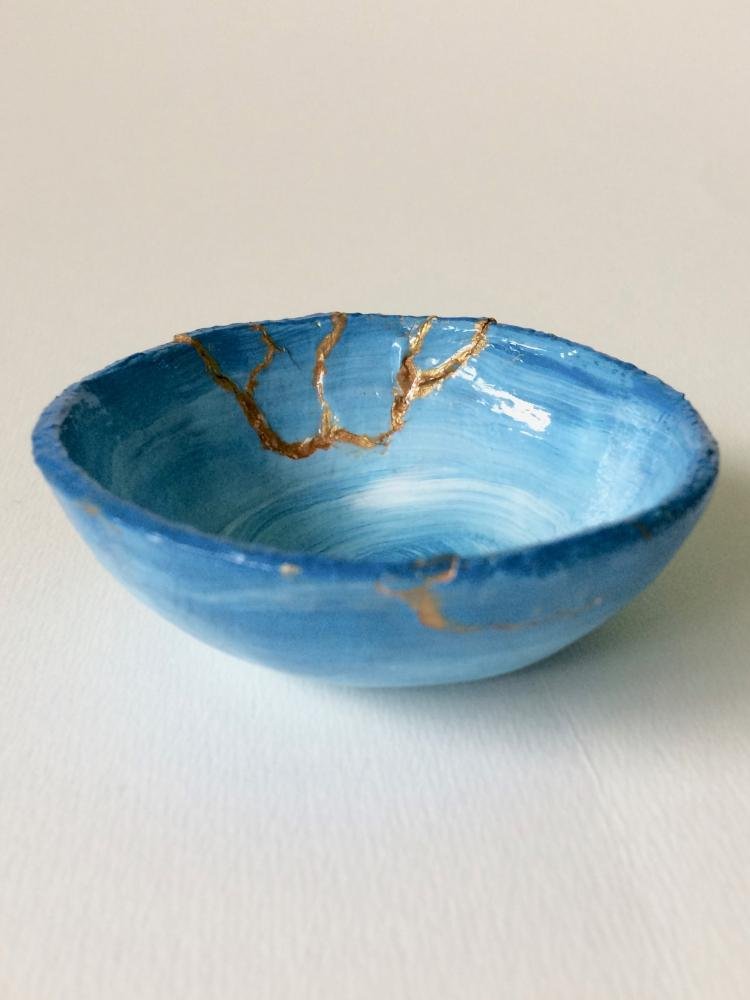
KINTSUGI BOWL:
Kintsugi translates to golden joinery – a way of mending breaks in ceramics with a lacquer of precious metals (usually gold powder), which in a way celebrates its break. The technique and practice of Kintsugi is centuries old and originates from Japan. The Zen philosophy being treat the item as still being useful, and to see its break and repair as part of its history.
You’ll Need:
- Acrylic paint (blue and white)
- Paintbrush
- Glue
- Gold acrylic paint
- Pliers
- Glue (ceramic glue is best, though here I used multi-purpose PVA)
To create the underlying design:
- Paint the bowl in a dark acrylic blue – then before it’s dry – place a dab of white paint in the middle of the bowl. Then, using the paintbrush, place this in the middle of the white paint, and pressing down repeatedly twist the bowl while steadily moving the paintbrush upwards. This will drag the white paint into the blue undercoat, causing a beautiful blend of the two.
- Once the inside is dry, turn over and repeat step 1 for the outside – but this time, move the paintbrush downwards to the rim.
- Once dry – varnish in gloss.
Kintsugi:
I’ve accidently broken many ceramics over the years, but for the purpose of this display, I deliberately broke the bowl. This can be done by using pliers to break parts off.
- Because it’s air-dry clay the breaks will be a little fluffy, but that’s okay. Try to resist sanding this down.
- To create the look of lacquer; mix acrylic gold with the glue. Then place this gold-glue mix on the breaks and push the parts together.
- Wipe away any excess with a damp cloth.
- Leave to dry.
It’s now complete.
