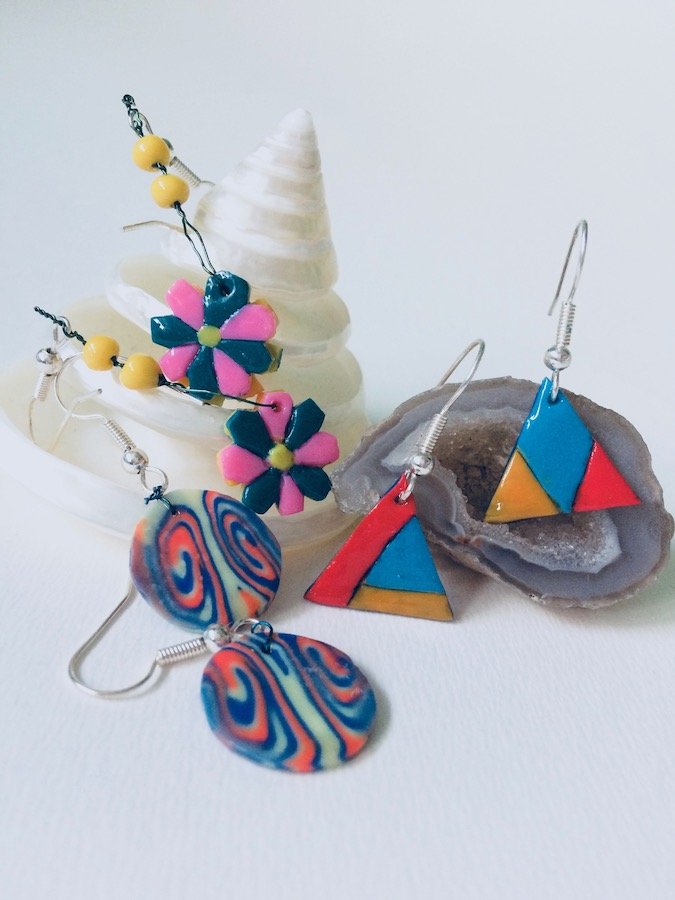
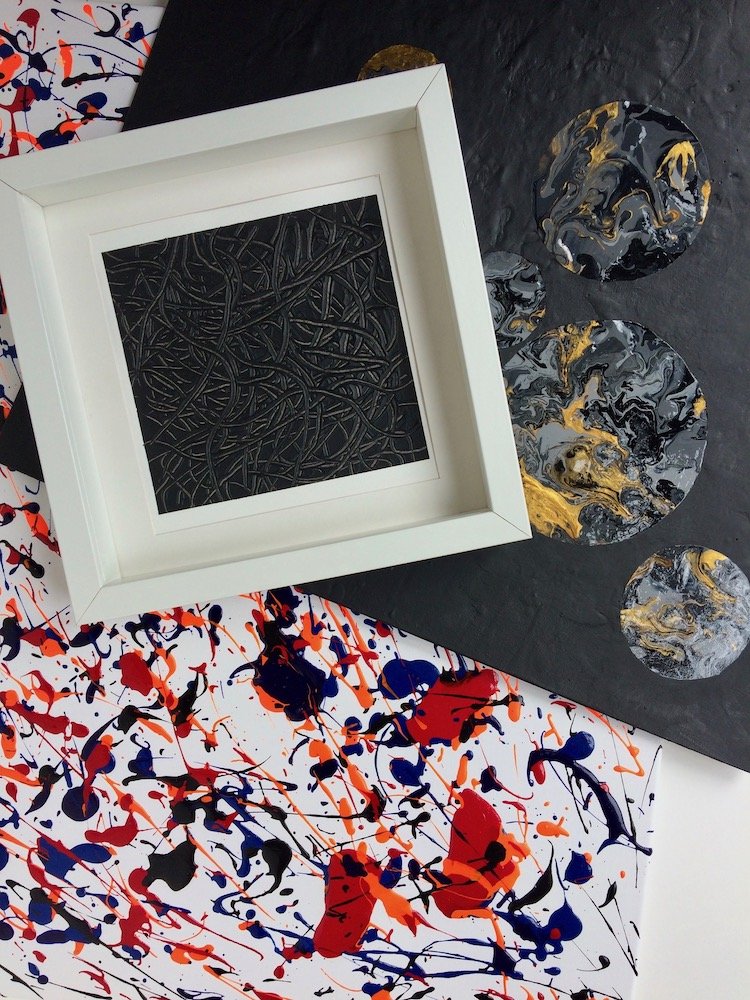
Stand-out from the crowd with these funky summertime earrings. Stylish to boot, these earrings are sure to complete any outfit, and add that little extra chic.
Level of difficulty: Medium
Materials:
- Polymer clay (multiple colours)
- Earring hooks
- Polyurethane gloss varnish
Tools:
- Rolling pin
- Craft knife
- Backing parchment/tin foil
- Pencil
- Ruler
- Pliers
- Compass
- Pin
- Paper
- Sandpaper
Tip: work with the lighter colours first as bright colours can stain both your mat and hand, and thereby transfer onto the lighter colours. Also working directly on the baking parchment reduces the risk of damaging the designs when you transfer them, which can happen if you’ve done them very thin.
ABSTRACT TRIANGLES:
- Draw a small triangle no bigger than a coin – cut this template out.
- Next, choose three colours of clay for the front of your earring. In this example I chose light blue, red and orange. From each colour, cut a piece of clay the size of a pea. Roll these out to only a few millimetres deep.
- Returning to your template – draw two more triangle templates. Then cut each of the two triangles into three parts. How you do this is up to you, as it will make the abstract pattern of the triangle.
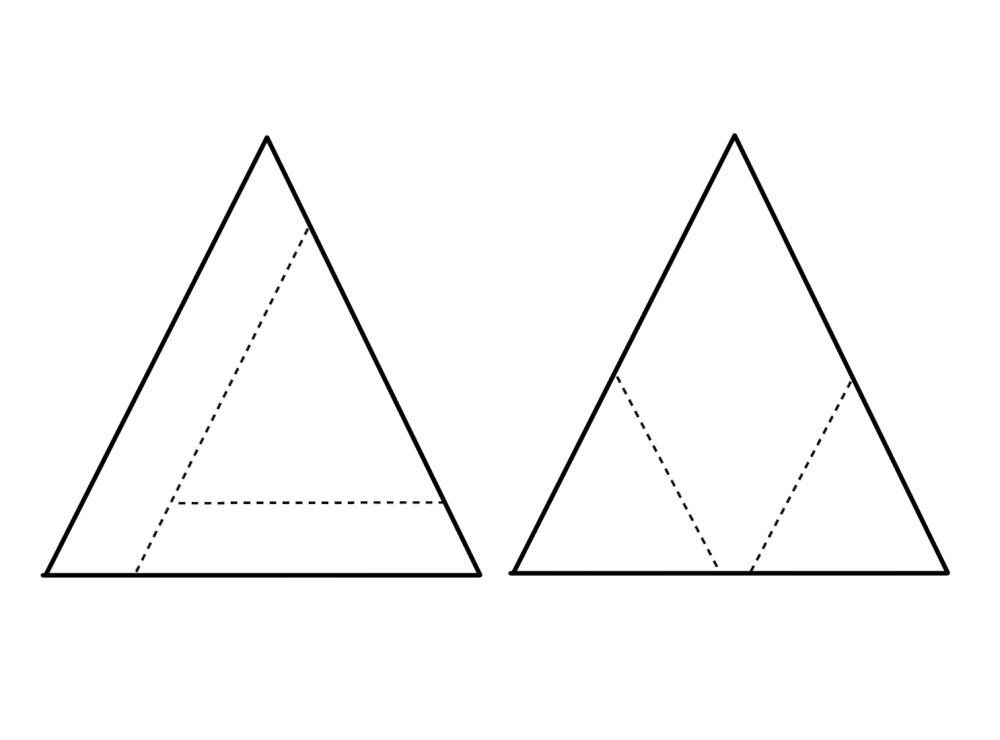
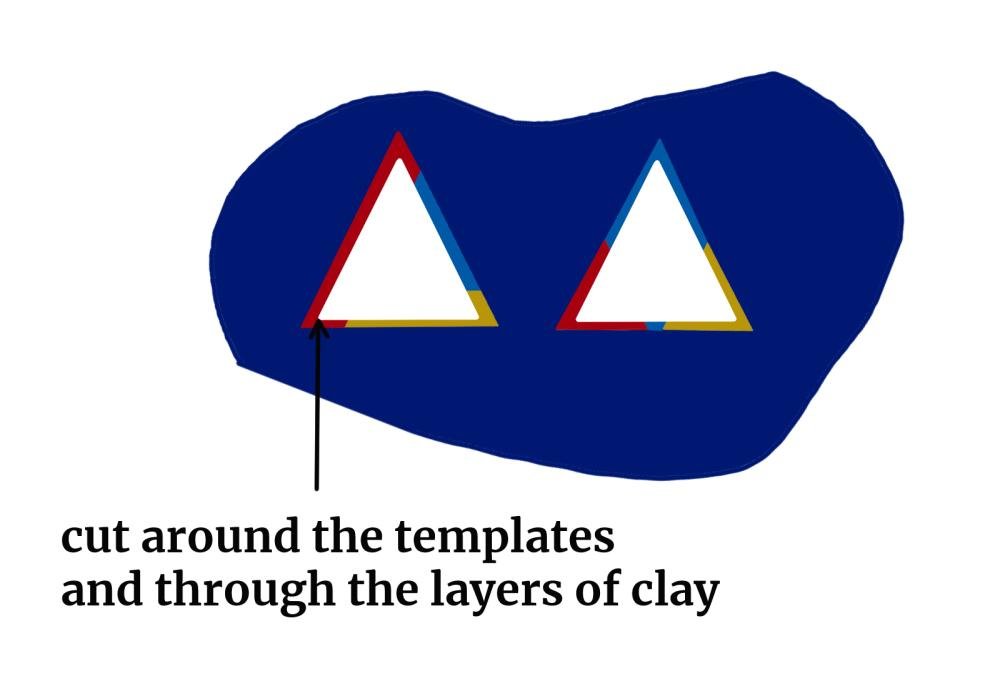
- Then place each part of the triangle onto three different colours.

Cut around these template “parts”, to create three different parts of a triangle, from three different colours. Put aside for now.
- Now, choose a sympathetic colour for the back of the earring. In this example I chose dark blue. Roll the clay to a depth of just a few millimetres. On top of this, place the three parts of each triangle back together – reforming the triangles.

- Using the rolling pin gently roll across and push these parts and backing together.
- Then using the original triangle template (step 1), lay this across the now ‘slightly’ larger triangle and trim off the excess. Repeat for the other triangle.
- At the top point of each triangle make a small hole for the earring wire to go through. The hole should be slightly bigger than the wire.
- Place the triangles onto the baking parchment/tin foil (without any wire) and follow the polymer clay baking instructions (varies per brand). As it’s quite thin follow the shorter time guidelines. Once cool, the clay will still be bendable due to its thinness.
- Sand down the backing and edges till smooth.
- Apply 1-2 layers of gloss varnish – leave to completely dry in between (normally 8-12 hours).
- Using the pliers, pull open the bottom loop of the earring and thread through the triangle. Once done use the pliers to close the loop again. Repeat for the other triangle.You now have your abstract triangles!

SWIRLED-MARBLE:
- Using a compass draw a small circle about 2cms in width – cut this template out, and put aside to use later.
- Cut out three different coloured clays, each about the size of a marble, and roll to a depth of just a couple of mms.
- Place one on top of the other, and then cut as large a rectangle as possible from them.
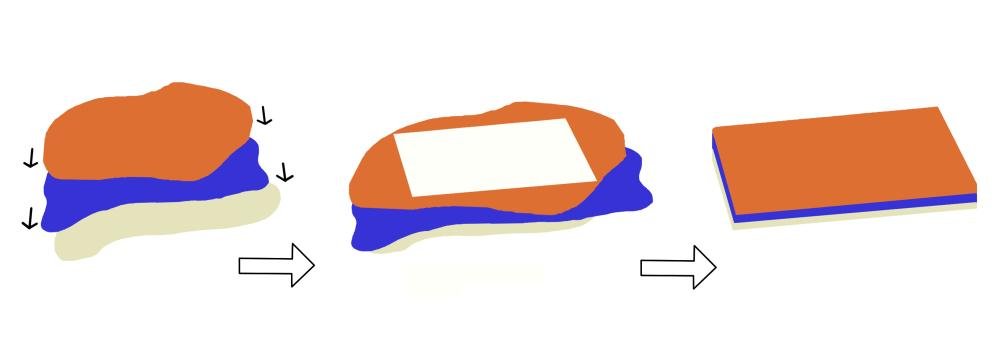
- Next, roll the rectangle into the shape of a pencil and about the width of a pea.

- Taking your craft knife; cut out a thin slice only a few millimetres in width. Turning it sideways you should see the colours have swirled inside one another. In total cut out four thin slices.
- Taking two of the slices, lie them down flat, with two of their sides together.

- Using the rolling pin, gently roll across the two slices – joining them together and flattening out the swirls.
- Then lay the circle template (created in step 1) across the joining of the two slices – so as to show the two different swirls. Cut around the template to form a circle.

- At the top of the circle make a hole large enough for the earring’s wire.
- Repeat steps 6-9, to form the other circle.
- Place the circles onto baking parchment/tin foil (without any wire) and follow the polymer clay baking instructions (changes per brand). As it’s quite thin follow the shorter time guidelines. Once cool, the clay will still be bendable due to its thinness.
- Sand down the backing and edges till smooth.
- Apply 1-2 layers of gloss varnish – leave to completely dry in between (normally 8-12 hours)
- Using the pliers, pull open the bottom loop of the earring and thread through the circle. Once done use the pliers to push the loop closed again. Repeat for the other circle.
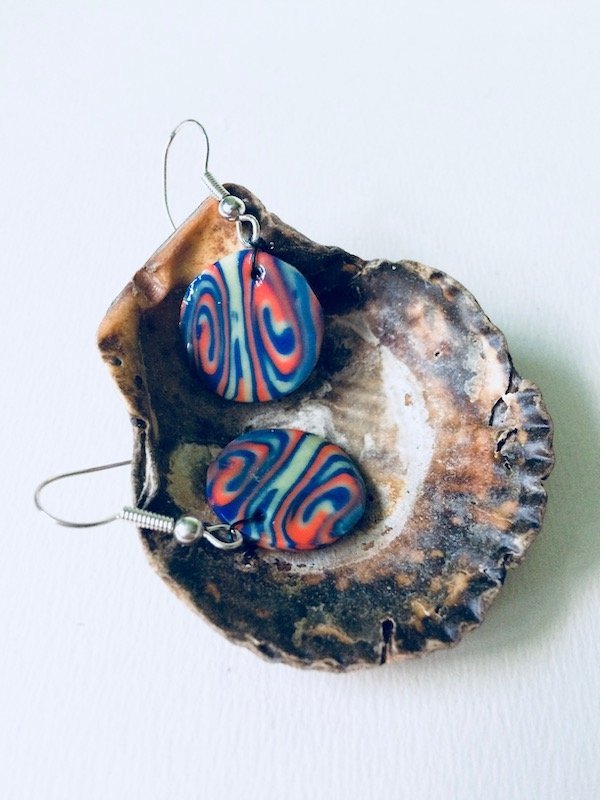
POLLEN AND PETALS:
- First, you need to make the flower template. Using a compass draw a small circle, roughly 2cms in diameter. Then draw lines dividing the flower into eight parts – have these lines go slightly outside of the circle. Using the dividing lines; draw small rainbow curves between each one, and thereby creating the outline of a flower.
 Cut along the outer outline to form the template.
 - Next, choose two different colours for the petals (here I’ve chosen a green and pink) and cut about a marble size from each. Put aside for now.
- You’ll also need yellow clay for the back of the earrings, and for the pollen. Therefore cut out slightly more yellow clay. Then from this make two small balls, and six extra-small balls. Put aside for now, along with the remaining yellow clay.
- Next, roll out the two colours you chose for the petals and to a depth of roughly 2 millimetres. Using the flower template – cut out four flowers from each of the colours, making eight in total.
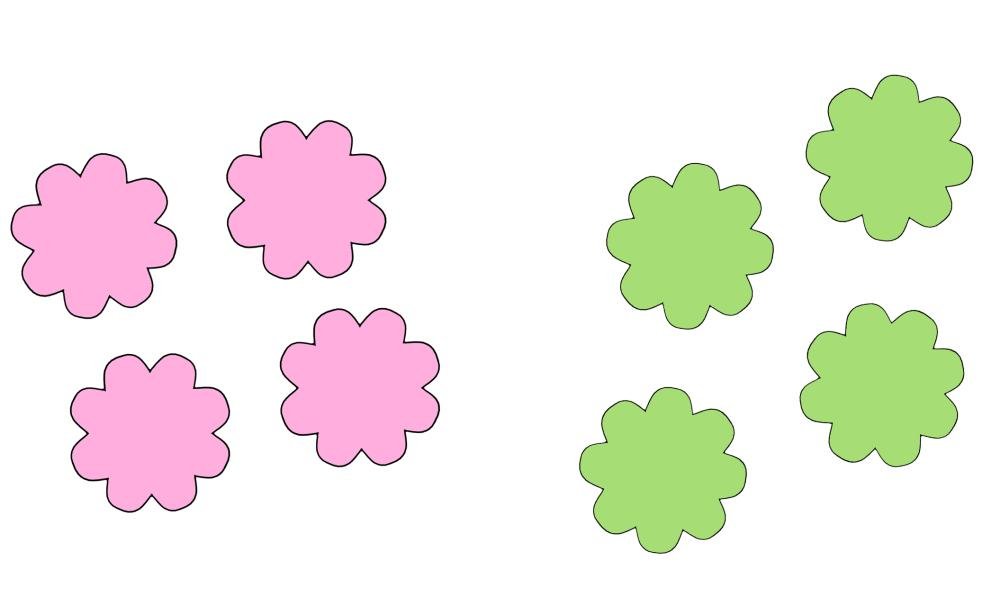
- Taking the flowers, cut each one into eight parts (making 8 petals).
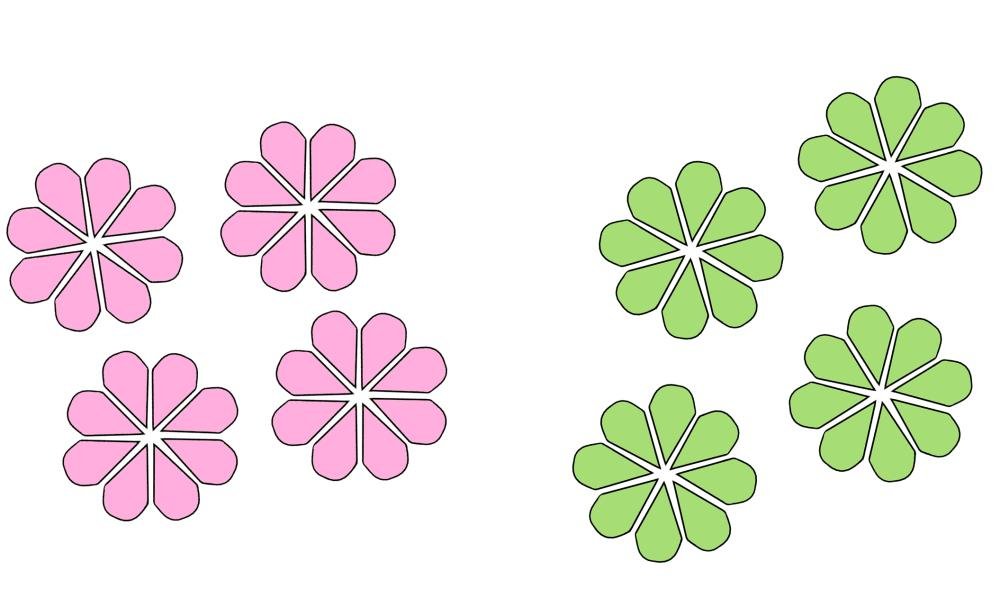
- Using the remaining yellow clay – roll this out to a depth of 2 millimetres. This will be for the flowers’ backing. On top of this, form new flowers (based on the original flower template) by alternating the different coloured petals (e.g. green and pink).
 Repeat this till you have four multicoloured flowers with a backing of yellow. Make sure not to place the flowers too close together.
- Returning to the yellow balls made earlier (step 3), take four of the extra-small yellow balls, and place one in the middle of each flower.

Then taking the rolling pin, very gently roll across the flowers pushing the petals, pollen and backing together – while not stretching the shape too much.
- Taking your earlier flower template (step 1), place this across the rolled-out flowers – positioning the pollen in the centre. Cut around the template.
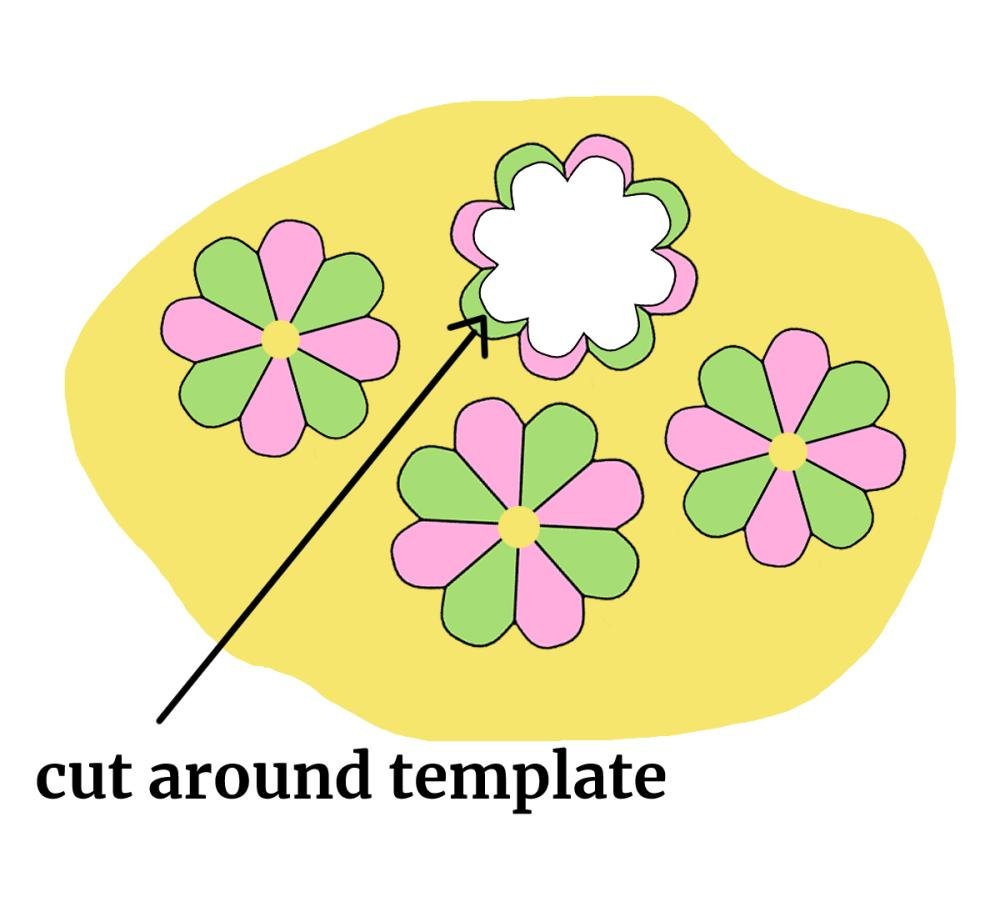
- You should now have four flowers, with a yellow backing. At the top of each flower – make a small hole for the earring’s wire to go through, but slightly bigger than the wire.
- With the remaining pollen balls (two small and two extra-small) – put a pin through the centre of each one and make a hole slightly bigger than the wire. This is to help in later threading the wire.
- Place the pollen balls and flowers onto baking parchment/tin foil (without any wire) and follow the polymer baking instructions (changes per brand). As it’s quite thin follow the shorter time guidelines. Once cool, the clay will still be bendable due to its thinness.
- Sand down the backing and edges till smooth.
- Apply 1-2 layers of gloss varnish – leave to completely dry in between (normally 8-12 hours).
- Next, cut a piece of threading wire to the length of 10cms. Thread on two of the flowers – their yellow backs should line up against each other, while the flower-side should face outwards. Curve the wire in half so it’s shaped like a U; leaving the flower petals hanging at the bottom. Half a centimetre up, start twisting the two ends of the wire together. A few millimetres after this, thread through the small pollen ball. Then, twist the wire for another few millimetres and thread through the extra-small pollen ball. After this twist the wire together for another few millimetres, before threading the wire through the earring’s loop.
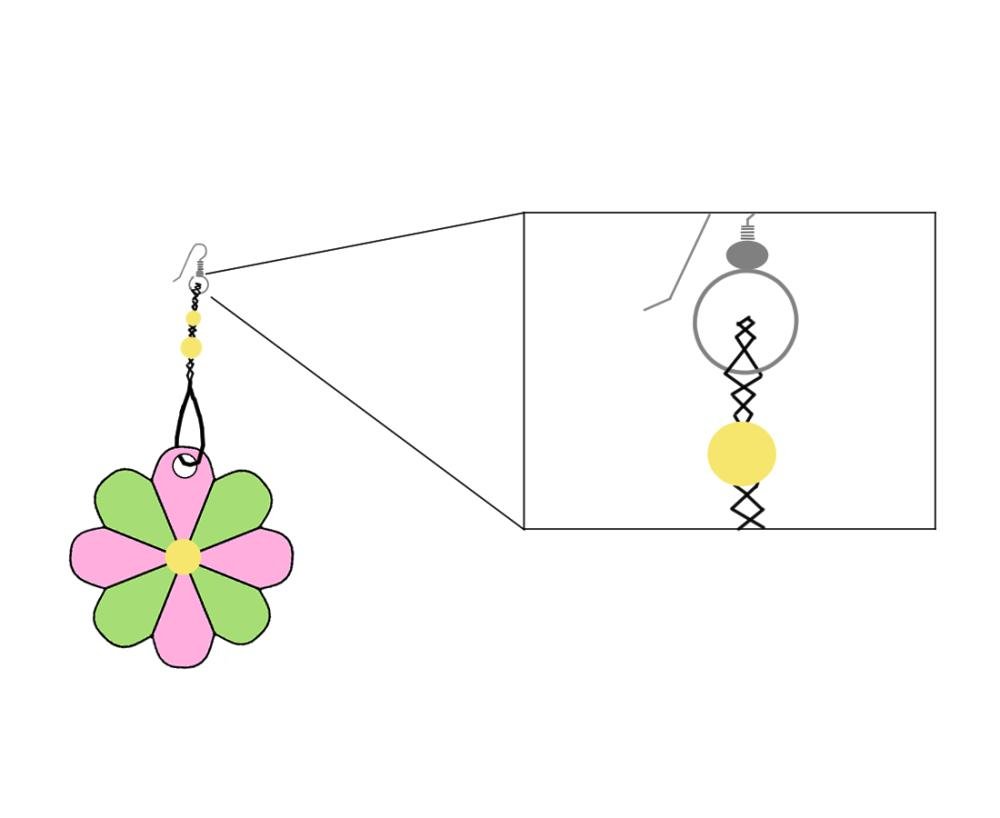
Use pliers to cut off any excess wire and place a small droplet of super-glue on the end.
- Repeat step 14 for the other earring.
You now have some flower-power earrings!!
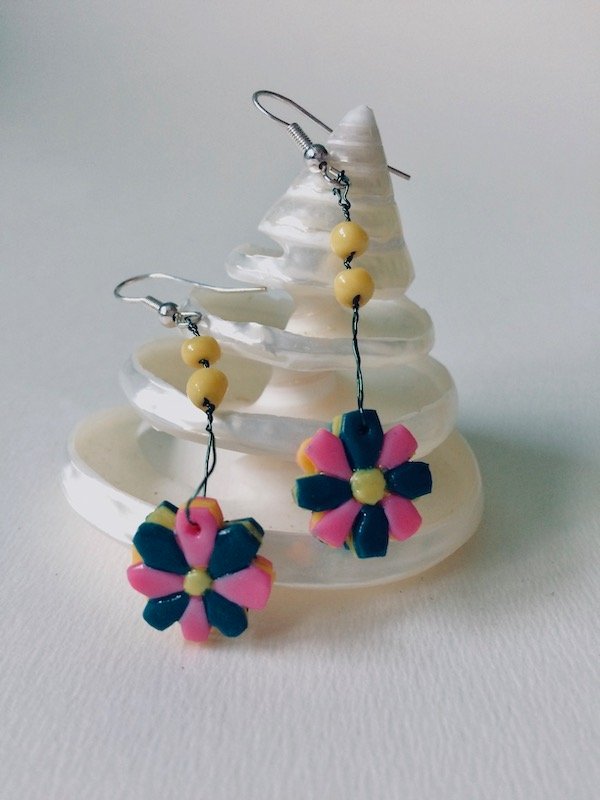
Whether you decided to make all three pairs of stand-out earrings, or just one. I hope you’ve had fun, and let your creative mind flow. Have some art or craft project you’d like to share? Why not send us a submission, we’d love to hear from you.

