Whether to clip to your bag, scarf, coat and more, brooches are making a fashion comeback, and thanks to these handy guides you can make a brilliant one of your own for any occasion.
Level of difficulty: Medium
Materials:
- Polymer clay (multiple colours)
- Brooch pins
- Superglue
- Polyurethane gloss varnish
Tools:
- Rolling pin
- Craft knife
- Backing parchment/tin foil
- Pencil
- Ruler
- Compass
- Pin
- Sandpaper
- Paper
Tip: work with the lighter colours first as bright colours can stain both your mat and hand, and thereby transfer onto the lighter colours. Also working directly on the baking parchment reduces the risk of damaging the designs when you transfer them, which can happen if you’ve done them very thin.
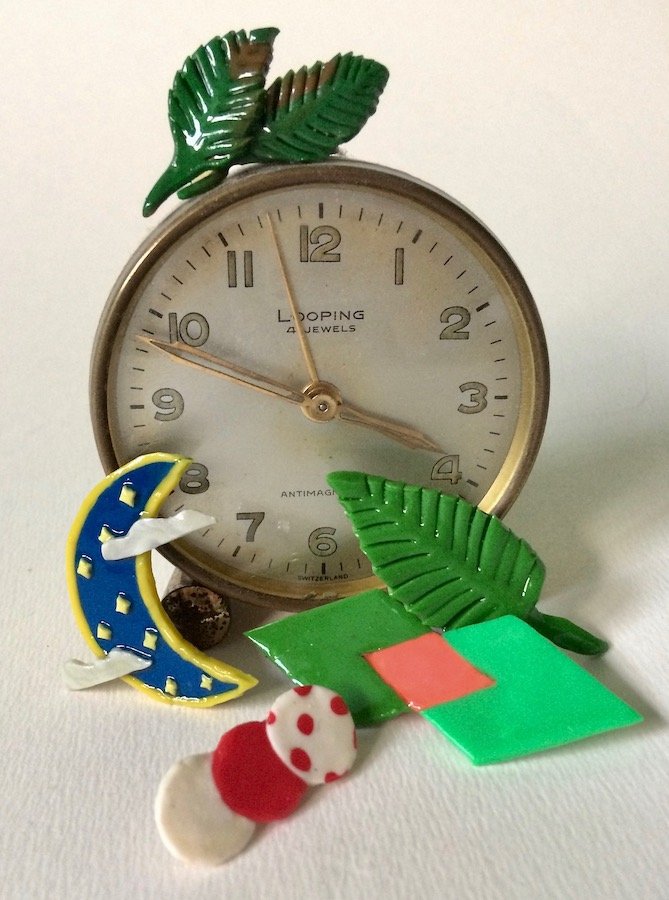
Three-Interlocking Diamonds:
1. Draw and cut out a diamond template about 3cms in length. (A simple way to create a diamond is to place the base of two triangles together).

2. Choose two different coloured clays, and from this cut out a pea size amount of each.
3. Roll each of the clays out to a depth of a few millimetres. Place the diamond template onto each of the two coloured clays and cut around it – producing two diamonds.
4. Taking some plain paper, place one of the diamonds on top of it and then place the other one – pointing in the same direction – half-way across it. In the end their points should line up with the middle of each diamond.
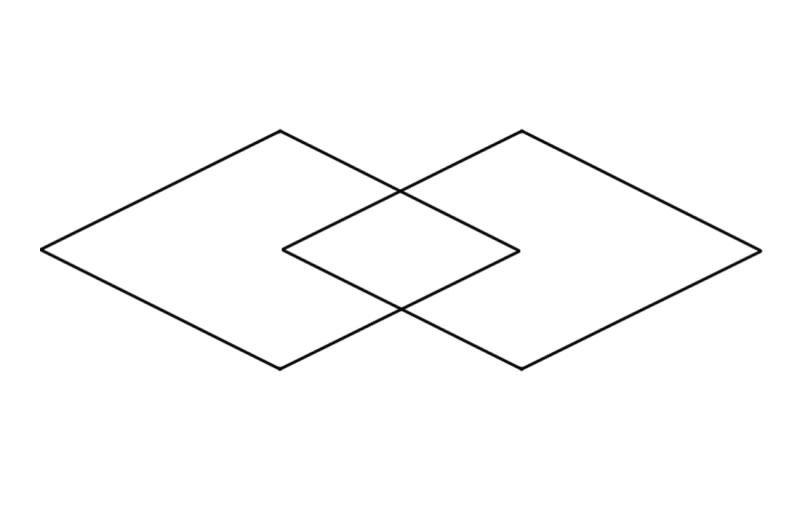
5. Cut along the outline of the diamonds and remove the clay where they overlap. This will the leave the hole of a much smaller diamond.

6. Draw around this smaller hole’s outline and onto the paper – giving you the template of a smaller diamond.
7. Next, choose a bright contrasting colour and from this cut out a small amount of its clay. Roll the clay flat to a few millimetres, and using the smaller diamond template (step 6) cut out the diamond.
8. Slot the smaller diamond between the two larger diamonds.

9. Where the different diamonds meet; smooth their edges together. Turnover and do the same on the other side – till it becomes one-piece.
OPTIONAL: A backing to the brooch can make it stronger. For this choose a sympathetic colour of clay (to match with your chosen colours) and roll out to a thickness of a few millimetres – lay the one-piece diamond on top, and then cut around the outer outline and into the clay. This action will join them together.
10. Place onto baking parchment/tin foil and follow the polymer baking instructions (it differs per brand). As it’s quite thin follow the shorter time frame. It will be relatively bendable, but not to worry.
11. Once cool, sand down the back and edges till smooth.
12. Apply 1-2 layers of gloss varnish – leave to completely dry in between (normally 8-12 hours)
13. Using superglue attach the brooch to the centre back. Complete!
Simple Polka-Dot
1. Draw a small circle template – 1cm in diameter.
2. Choose two different coloured clays (in this example I chose red and white), and take a pea size amount of each clay and roll it flat. Placing the circle template onto each clay, cut around the template; creating two small circles. Put these aside for now.
3. Still using these two different colours – select one for the backdrop, and the other the dots. For the backdrop, take a pea size amount of clay and roll it flat.
4. For the “dots” roll out small balls about the size of a pin head, and space them evenly across the backdrop. Next, take the rolling pin and roll across these balls – pushing them into the backdrop and thereby creating the polka-dot effect.
5. Using the earlier circle template (step 1), lay it across the polka-dot clay and cut around its edges.
6. Taking this and the two circles you made earlier, you should now have three different circles. Slightly overlap these circles; and then cut around their outline.
Remove the overlapped clay. At the end it should look like one full circle and two crescent circles:

7. Where the circles now meet; smooth and join the edges together. Turnover and do the same for the back.
OPTIONAL: A backing to the brooch can make it stronger. For this choose a sympathetic colour of clay (to match with your chosen colours) and roll out to a thickness of a few millimetres. Lay the connecting-circles on top, and cut around their outer outline and into the clay below – joining the two together.
8. Place the final design onto baking parchment/tin foil and follow the clay’s baking instructions (it differs per brand). As it’s quite thin follow the shorter time frame. It will be quite bendable, but don’t worry.
9. Once cool, sand-down the backing and edges till smooth.
10. Apply 1-2 layers of gloss varnish – leave to completely dry in between (normally 8-12 hours)
11. Use superglue to attach the brooch to the centre back. Done
Leaf:
1. For this, shades of green work best. Having chosen your clay colour, roll this out to a thickness of 3-4 millimetres.
OPTIONAL: blend-in – do this by rubbing different coloured clays together – a different shade of green, or yellow and brown – this gives the leaves an aged appearance.
2. Directly cutting into the clay – form a large oval with a point at one end.

Holding one end in place, slightly bend the other end away – causing a slight curve to the leaf.

3. Next take a small amount of clay (the same colour as your leaf) and roll this into a small cylindrical shape – this will be for the stem. Attach this to the more rounded end and in the middle.
4. Then using your craft knife, make diagonal lines either side of the oval leaf and pointing towards the stem. HOWEVER, make sure the lines on either side don’t touch – leaving a small gap to run down the middle. Without this the leaf would split and break.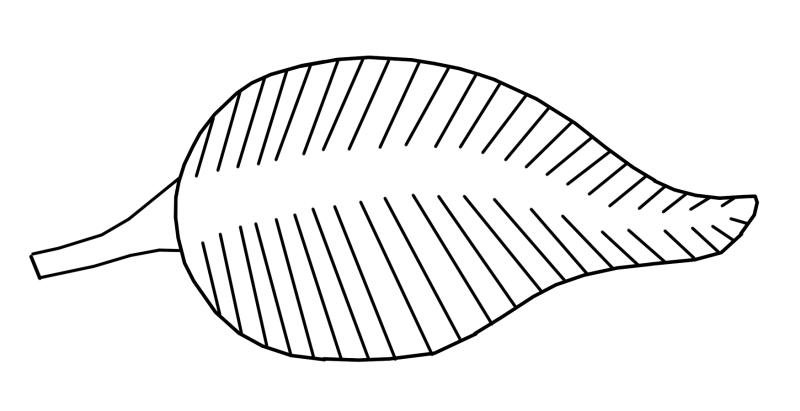
5. Place the leaf onto baking parchment/tin foil and follow the clay’s baking instructions (it differs per brand). As it’s quite thin – follow the shorter time frame. It will be quite bendable, but don’t worry.
6. Once cool, sand-down the backing and edges till smooth.
7. Apply 1-2 layers of gloss varnish – leave to completely dry in between (normally 8-12 hours)
8. Use superglue to attach the brooch’s pin to the back and centre. Done
Crescent-Moon:
1. Draw, and cut out a crescent template. This can be done by overlapping two circles.
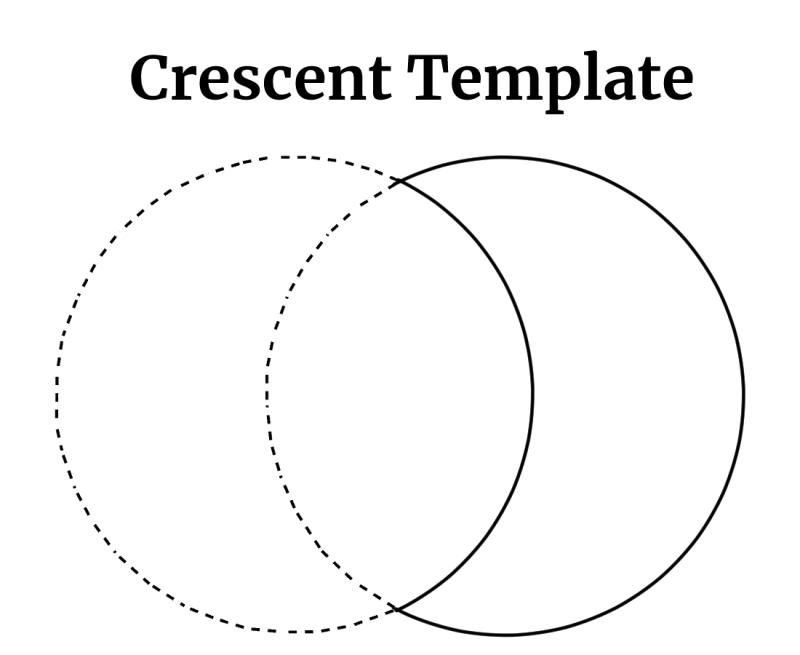
2. Choose a dark blue clay, and taking a marble size amount of it; roll it to a thickness of a few millimetres. Then using the crescent template, draw around and cut out your moon.
3. Next, take some yellow clay, about the size of a pea, and roll this into two thin lines – make sure they’re longer than the height of the crescent.
4. Wrap one of these lines around the inside of the crescent, and the other around the outside – pinch the ends together and cut off any excess. This will put a nice yellow outline around the blue.
5. Returning back to the yellow clay, take a pea size amount of the clay and roll this to a very thin depth. From this cut out tiny squares.
6. Pinch the corners of each square – changing them to tiny diamonds.
Scatter these diamonds across the crescent, and very slightly push them down – joining them to the backing – but you don’t want to flatten them out.
7. Finally, taking some white and grey clay, rub the two together till blended in. Next, roll this to a thinness of few millimetres and cut out two small clouds – both with a straight base. Place one cloud on the inside of the crescent at the top, and the other at the bottom, touching the outside.
8. Place the completed crescent moon onto baking parchment/tin foil and follow the clay’s baking instructions (it differs per brand). As it’s quite thin – follow the shorter time frame. It will be reasonably bendable, not to worry.
9. Once cool, sand-down the backing and edges till smooth.
10. Apply 1-2 layers of gloss varnish – leave to completely dry in between (normally 8-12 hours)
11. Using superglue, attach the brooch to the centre back. Done
With different designs to choose from, maybe you’ll make more than one brooch.

