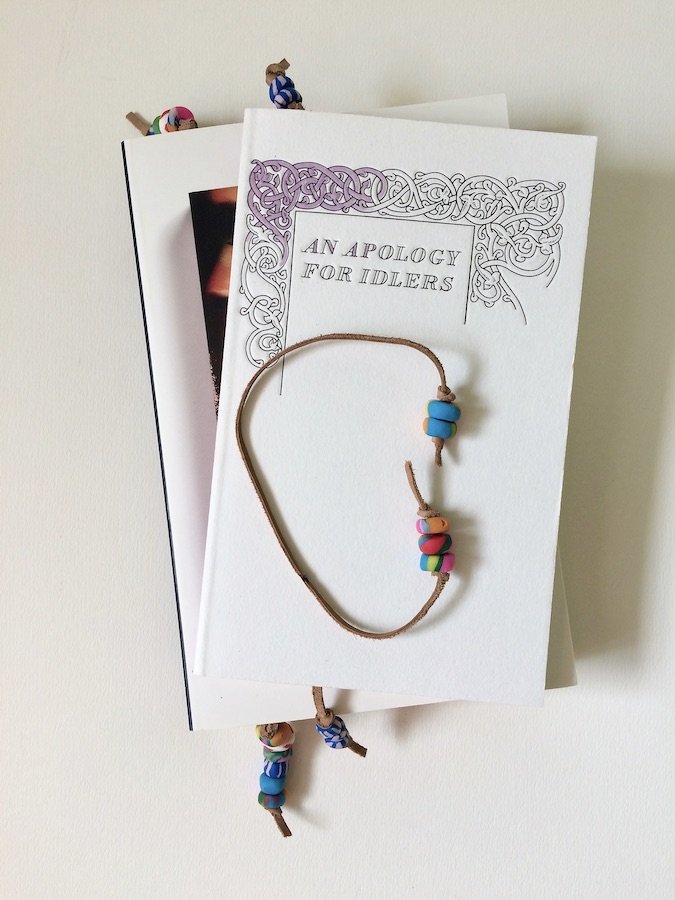
Bookmarks can be, well boring, or worse they slip out of the book meaning you lose your place. Well not anymore, these funky bookmarks can be made distinctive to your style, easy to make, and best of all won’t fall out from the book.
Level of difficulty: Easy
Materials:
- Polymer clay (multiple colours)
- Leather shoelaces (usually sold in lengths)
Tools:
- Knitting needle
- Craft knife
- Scissors
- Rolling pin
- Baking parchment/tin foil
Using the polymer clay, you’ll create beads of different colour and design.
Marble-design beads:
Take 3-5 different polymer clays and roll each one into a long thin line – like a piece of string – then twist each of the lines together, before rolling into one long length (much like a pencil, although slightly thinner). You can also just pinch different polymer colours together and roll into a long line. However, this last method can cause the colours to be less distinct.
Simple one-block beads:
Choose one colour and roll it to be slightly thinner than a pencil.
Drip/splash beads:
- Choosing one colour, roll the clay flat to a couple of millimetres.
- Then select a contrasting colour, roll this into small balls the size of a pin head. Place the balls dotted about the rolled-out clay.
- Taking the rolling pin, roll over the balls, pushing them as dots into the clay.
- Making sure to keep the dots on the outside, roll the clay inwards till you’ve made a long line. Roll this until slightly thinner than a pencil. The dots will now appear like splashes of paint.
Striped beads:
- Select one colour and roll it to be shaped like a pencil but half its width.
- Next, choose a contrasting colour, roll out several lines thinner than a piece of string. Make sure these match the same length as the clay in step 1.
- Then position the thinner clay lines next to each other – like vertical bars – keeping a very fine gap between them.
- Then taking the larger clay you made in step 1, roll it lengthwise across them.

They should instantly stick together, and if you roll just a couple more times, it will push them firmly together. Making a striped bead.
Finishing the bead:
- When you’ve finished your bead designs; take your craft knife and cut along its width every few 5-8mms – this will make the bead shape.
- Next, place a knitting needle through the centre of the beads; making a hole big enough for the lace to fit through.
- Place the beads on the baking parchment/tin foil (without the knitting needle or lace) and follow the polymer’s baking instructions (changes per brand). However, the thicker the clay the longer it takes to bake, and the more rigid it becomes. Once baked, leave to cool.
- Cut the leather lace into lengths of 35cms. Tie a knot at the bottom, and thread a few beads through. When you have decided how many beads to have at the bottom – tie a knot at the top of those beads.
- Next, we need to measure a knot for the top beads to sit on. To do this place the lace inside the book and across its length (top to bottom) – making sure the beads at the bottom of the lace are hanging out. This is because you want the pages of the book to lie flush, for you don’t want any knots or beads stopping this. Then, to give you a marker on where to tie the top knot, close the book with the lace inside.
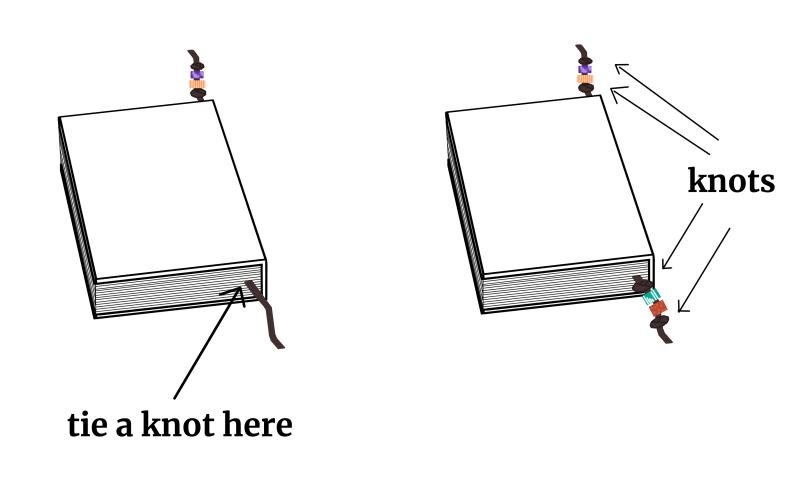
Tie a knot near the book’s edge, before threading through the top beads. Once done, tie a final knot at the top.
Congrats, you now have your own bespoke hippy-licious bookmark.

