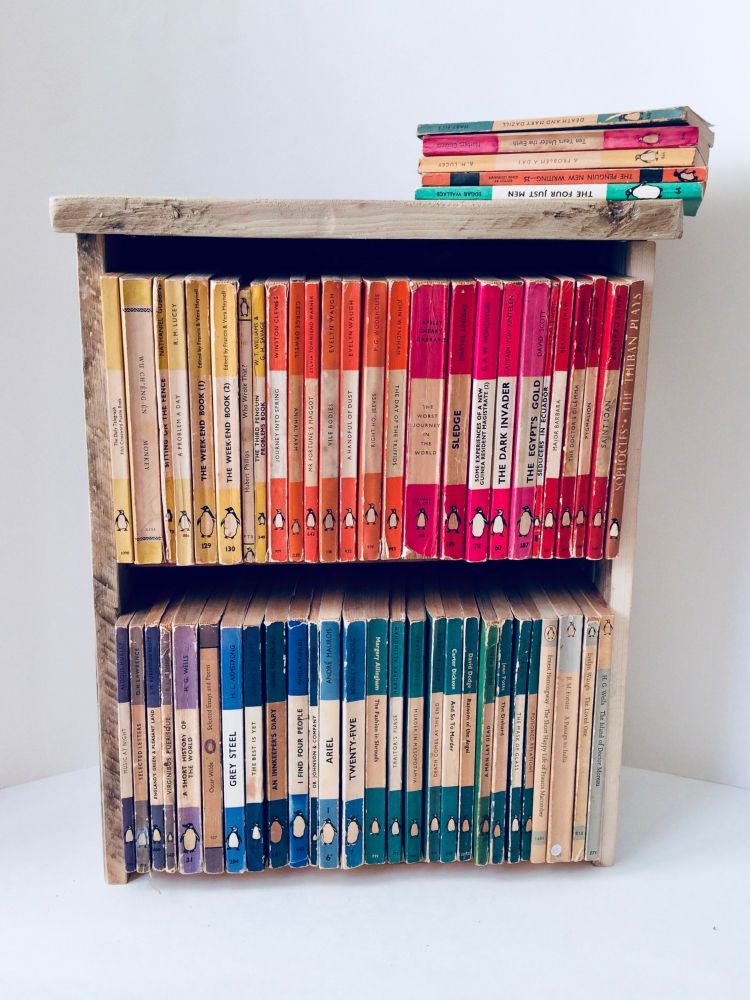
Have some scrap wood and don’t know what to do with it? In this guide, I’ll show you how to build a very narrow bookcase – perfect to fit in a tiny entrance or hallway, while tidying up a few loose items and books.
This guide will walk you through all of the steps, but it’s not for the faint hearted, with no screws or nails being used, it’s a bit of a challenge and you may learn some new curse words along the way.
Level of Difficulty: Hard
This guide will provide the style and technique, while the measurements used act as a rough guide, leaving you to choose and vary the size.
Materials:
- 50 Wood dowels (8x40mm, there should be a couple of spares)
- Oak or pine wood
Tools:
- Pencil
- Measuring tape
- Ruler
- Saw
- Hacksaw
- Drill
- Hammer
- Sandpaper or sand-belt
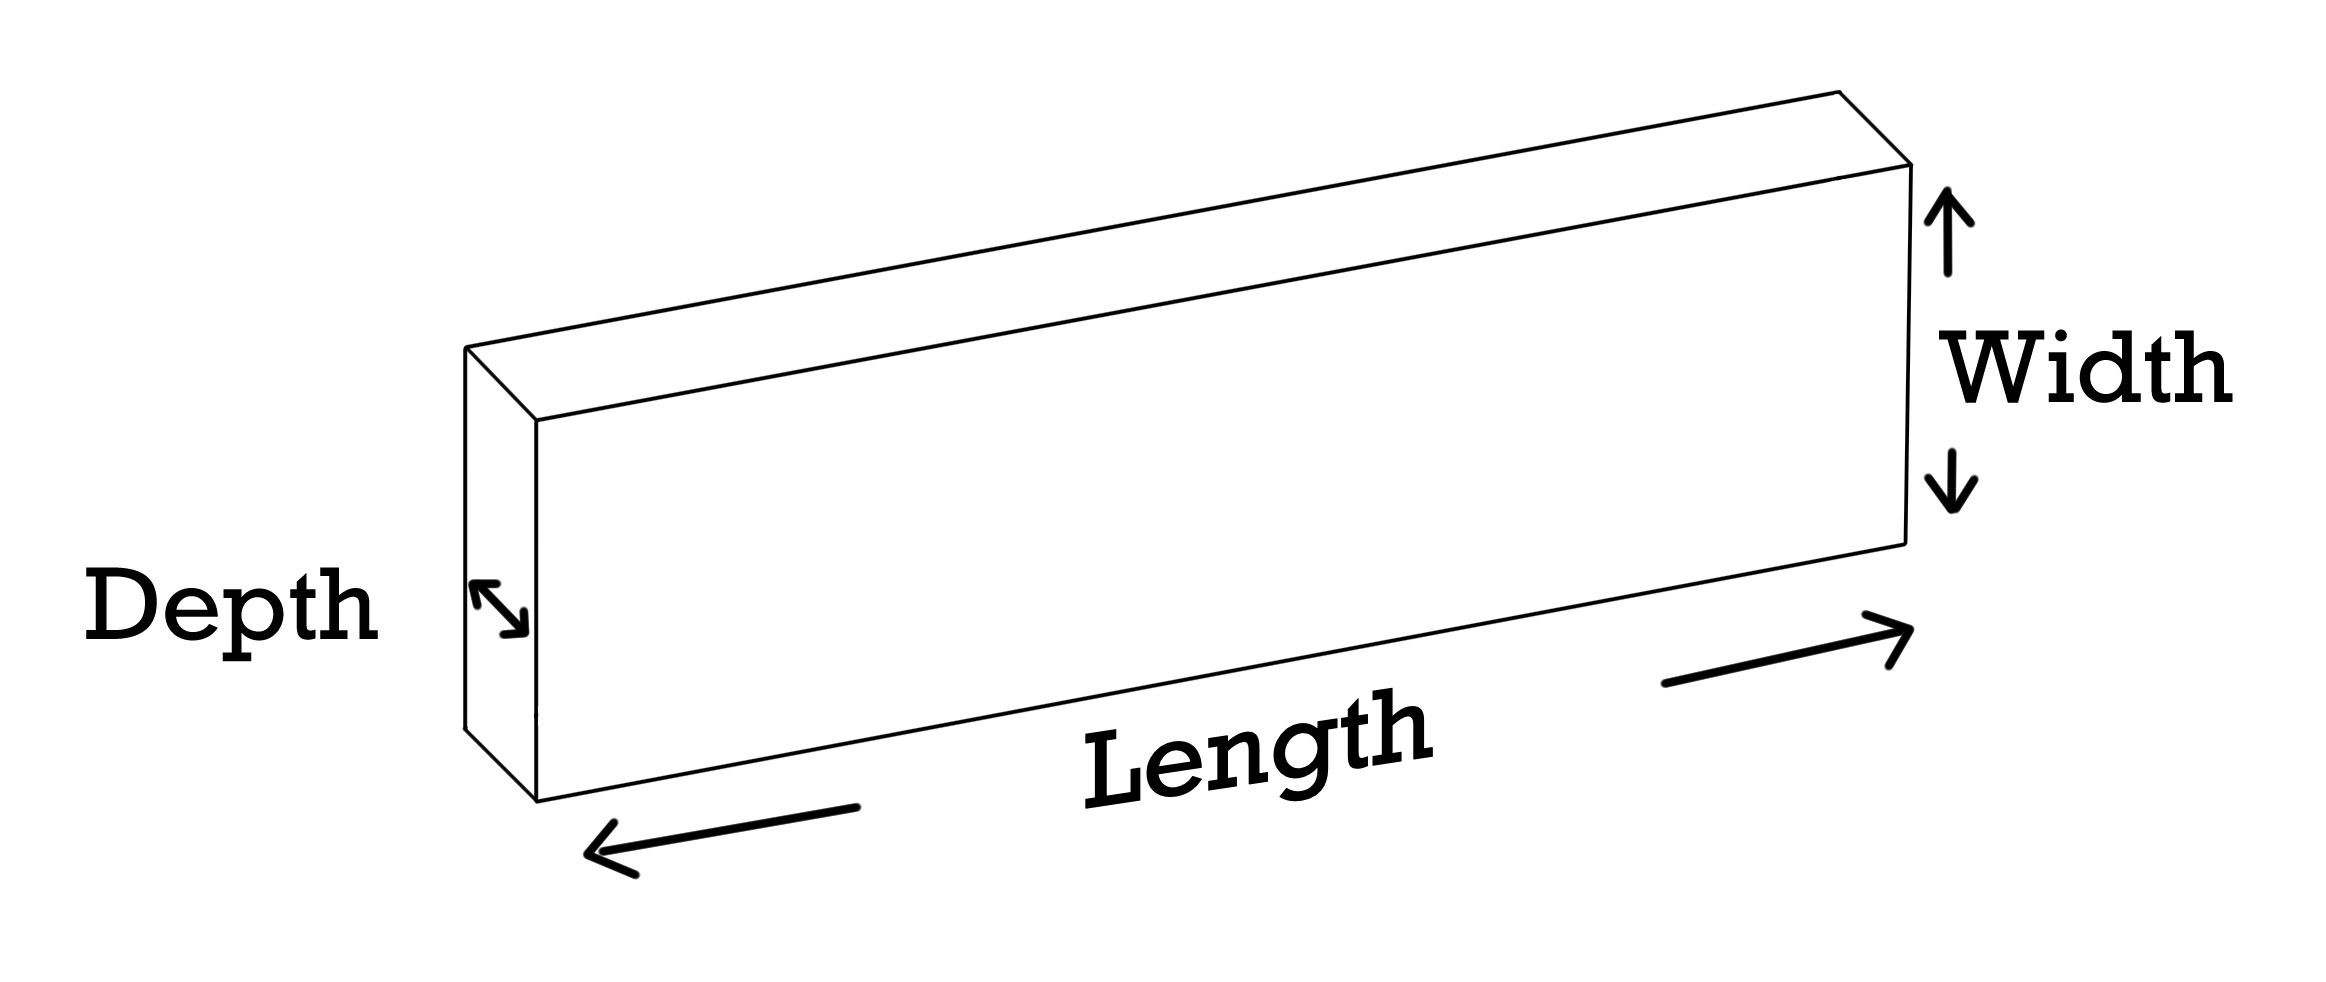
Please note depth means the thickness of the wood.
Preparing the wood
The shelves:
- The bottom shelf will be slightly wider (minimum: 13cm) than the middle shelf (minimum: 10cm), this is because the back of the bookcase will rest on it. However, both shelves must be of the same length (minimum: 33cm). Measure and mark where the wood needs to be cut – saw along the pencil lines, then smooth the edges with sandpaper.
- The top shelf will be the largest of the shelves due to it fitting across the top of the bookcase, and with a slight overhang.
– The width therefore is the same as the bottom shelf plus extra to have a slight overhang.
– It will also need to be longer in length than the other shelves. To measure this take the length of one of the shelves and add the depth of the two sideboards (sides of the bookcase).
– Measure, pencil mark, saw and sand.
(In this example the top shelf is also slightly deeper, but that’s personal choice.)
The backboards:
- The backing to the bookcase is formed from horizontally stacked wood (backboards). Each of these must be the same length as your bottom and middle shelf.
The sideboards:
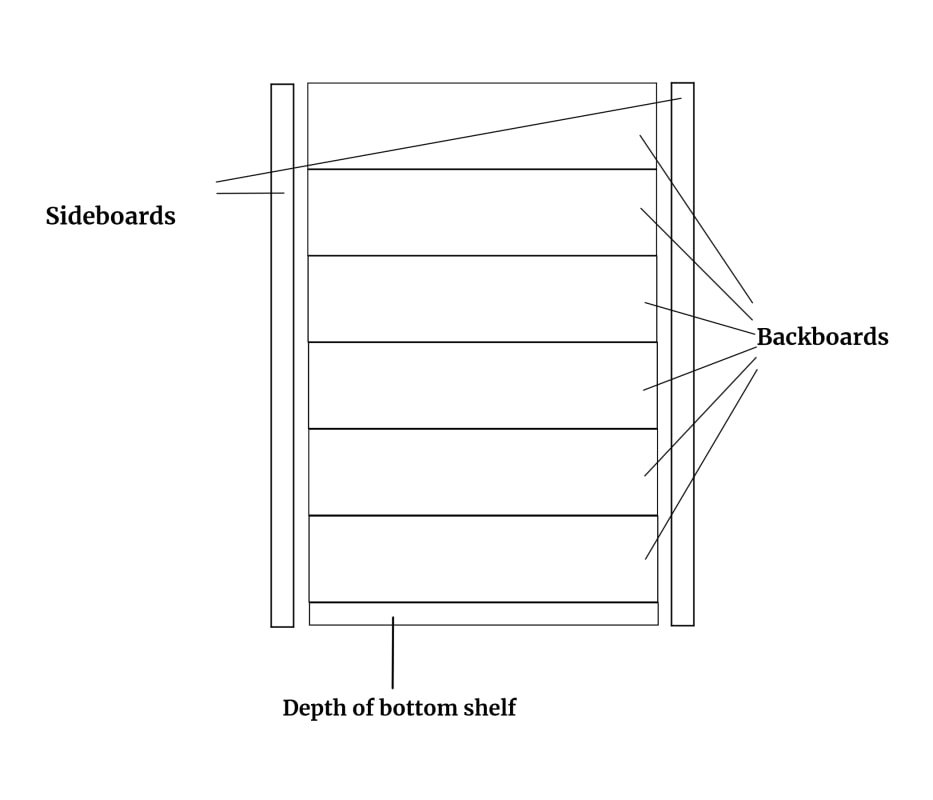
- To start with, the sides of the bookcase must match each other, both in width and length (minimum length: 44cm). Now the width can either match the bottom shelf (minimum: 13cm) or be slightly bigger. The sideboards must match the combined width of the backboards plus the depth of the bottom shelf. Measure, pencil mark, saw and sand.
- Measure, pencil mark, saw and sand.
Before drilling, you want to test the size of the drill-bit is correct (it should match the width of the dowel you’re using), this is best tested using a scrap of wood; the dowel should go easily enough into the hole (maybe with a little tap from a hammer), but should be hard to pull out. If the dowel is too loose then the drill-bit is too big, too tight and the drill-bit is too small.
Construction:
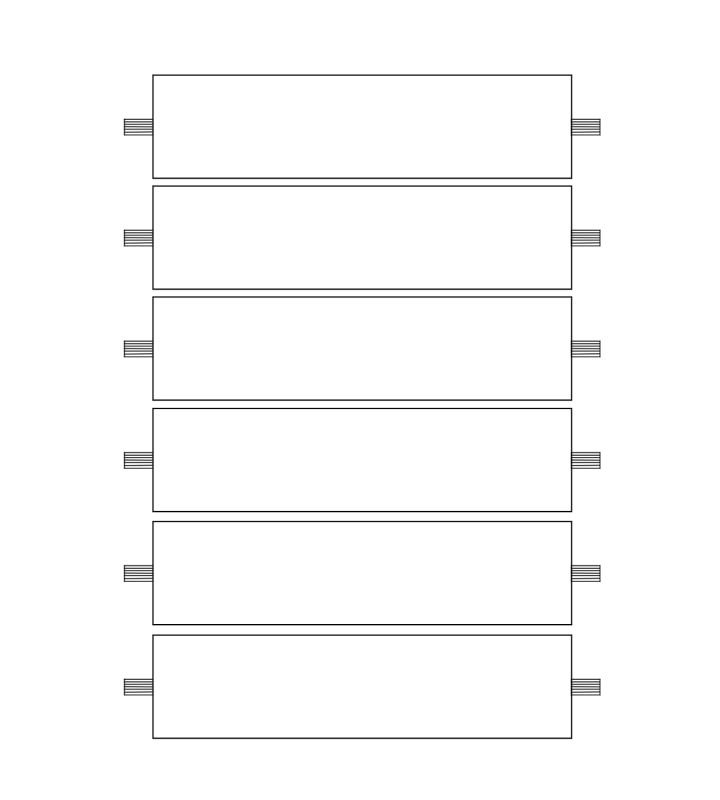
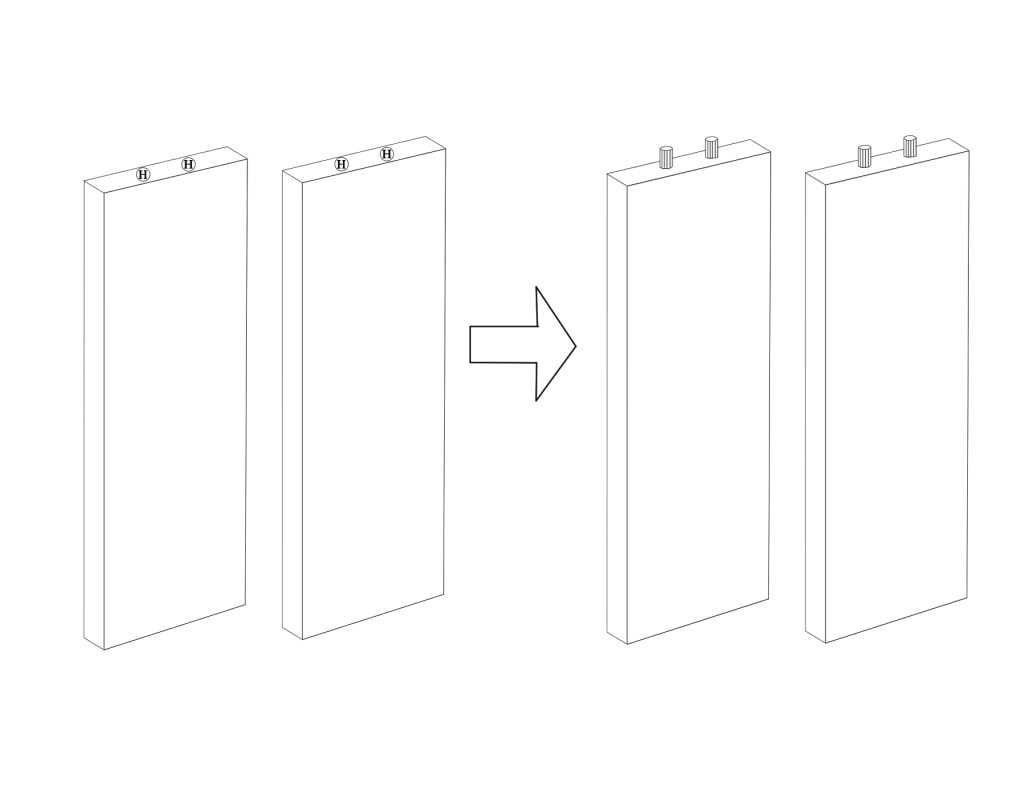
- Decide the order of your backboards, then mark a hole along the centre-width and depth of each backboard – this is for the dowel to go in. Make sure to do this for both ends.
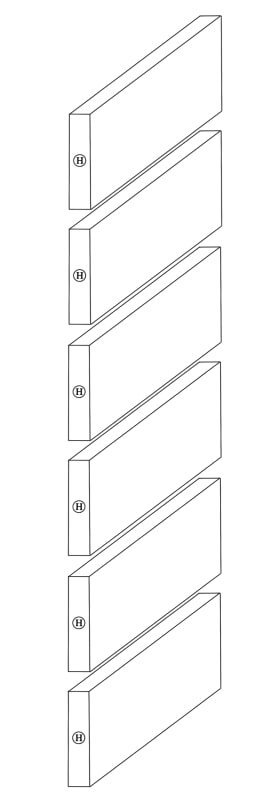
- Before drilling the hole remember you want some of the dowel exposed – this is to help join it to the sideboards. Therefore, slowly drill and test the length of the hole using the drill-bit as a guide. You want about 1/3 of the dowel left showing.
- Once happy, hammer the dowels in. It should look like this;
- Now we want to join the backboards together. For this:
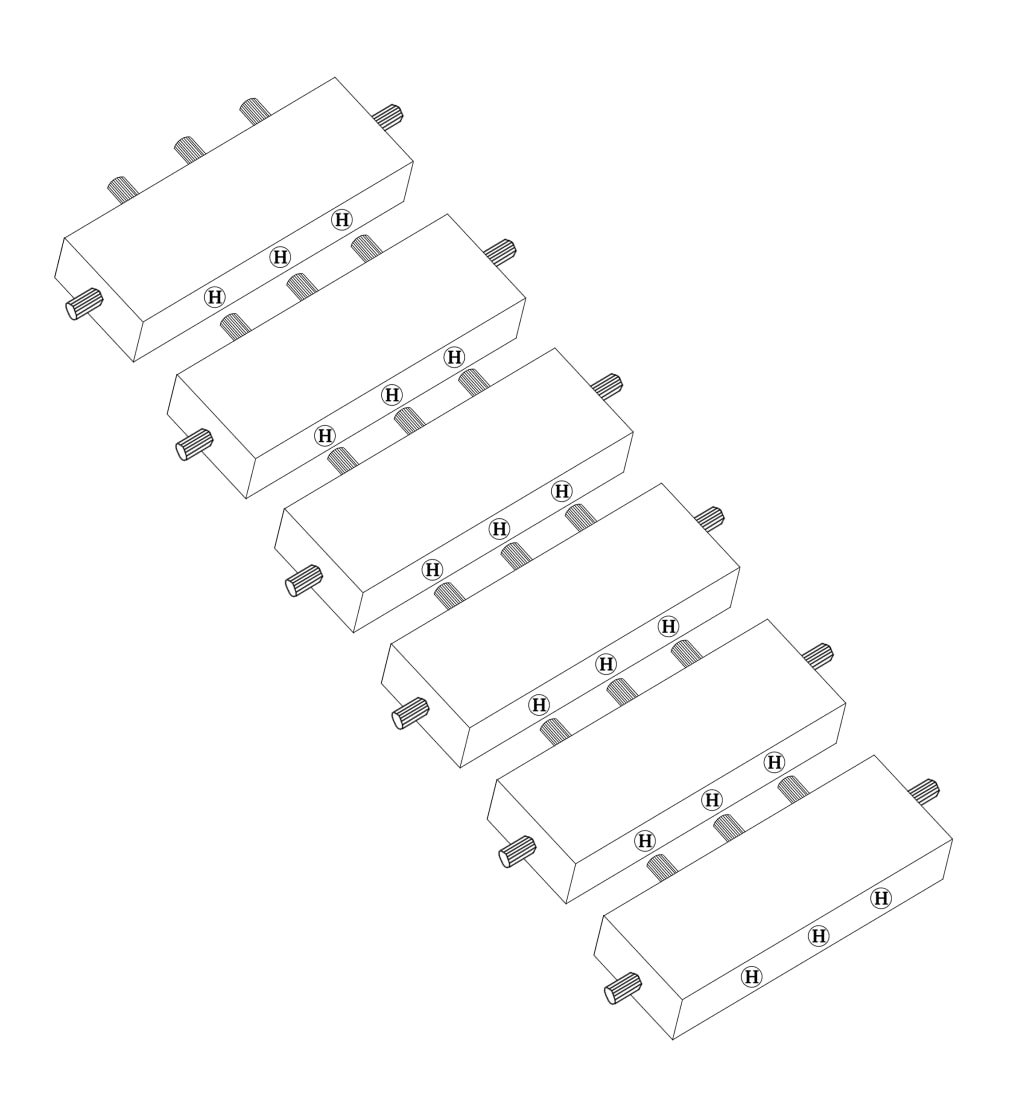
- Mark the position of three dowels along the length and centre-depth of the backboards – do this on each backboard but on one side only. Mark the holes equally apart and about 4cms away from the ends.

- When drilling the holes you want half the dowel to be left sticking out (except for the top backboard – but we’ll come to that). Therefore, slowly drill down a bit at a time to ensure the holes are not too deep. Then hammer in the dowels.
- With the top backboard, the dowels will attach to the top shelf. Therefore, when drilling the holes make sure the exposed part of the dowels will be shorter than the depth of the top shelf. Hammer in the dowels.
- When constructing the bookcase it’s essential that the backboards align. To do this measure the position of each backboard’s three dowels and then on the next corresponding backboard make a pencil mark for their holes:
- Before drilling ensure the dowels and the pencil-marked holes align. Top-tip: put a dab of paint on the end of each dowel and push the woods together – you’ll soon see if the pencil-marks align. If not alter accordingly.
- When drilling make sure you’ve gone deep enough for the remaining half of the dowel to go fully-in. If not, you’ll be left with a gap between the wood.
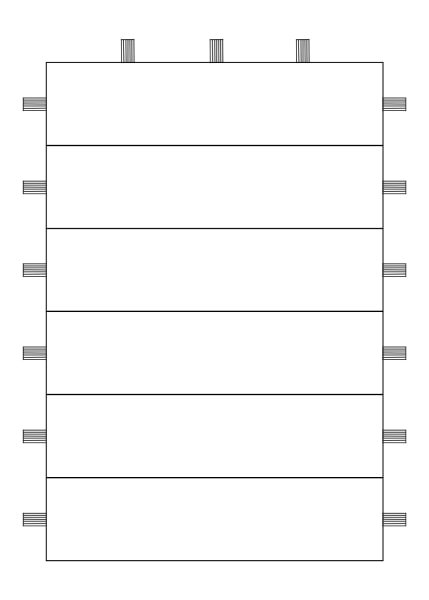
- Gently hammer (hint: place a cloth between the wood and the hammer) and tap the backboards together. Do this one at a time, working your way up the backboards until they’re all connected, and form one backboard.
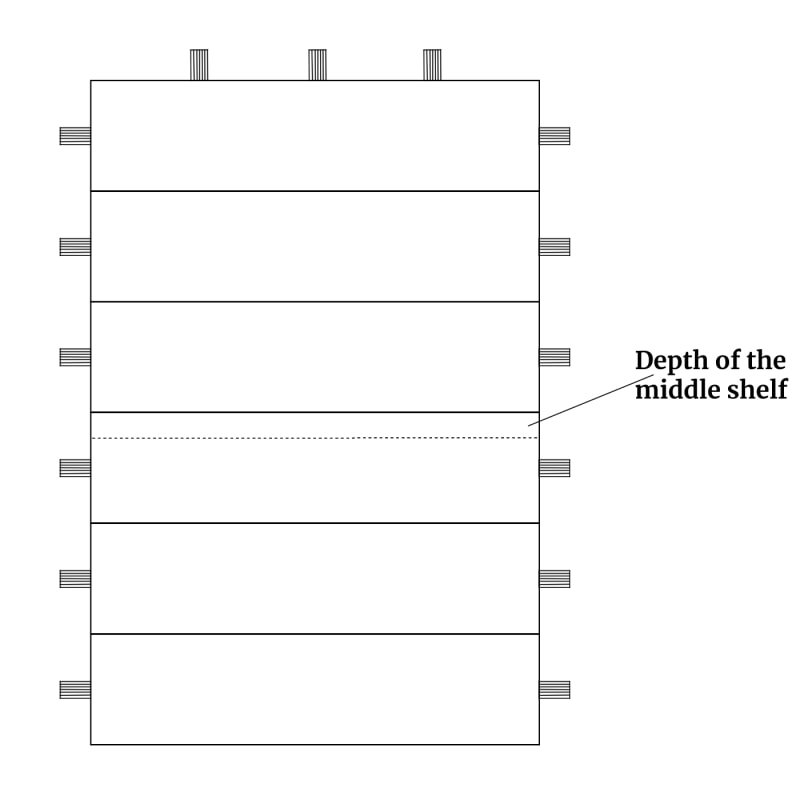
- Measuring the total length of the backboard, from top to bottom, and mark a midway point. If this happens to land on a join in the wood, place the mark either below or above the join – for this is where the middle shelf will go. Using the midway point, measure and pencil-mark the depth of the middle shelf – again make sure this never goes over a join.
- Picking up your middle shelf; mark, drill and place three dowels along its length and centre-depth. Make sure they’re equally spaced and at least 4cms from the edge. When doing this ensure enough of the dowel is exposed to join the backboard, but is shorter than its depth.
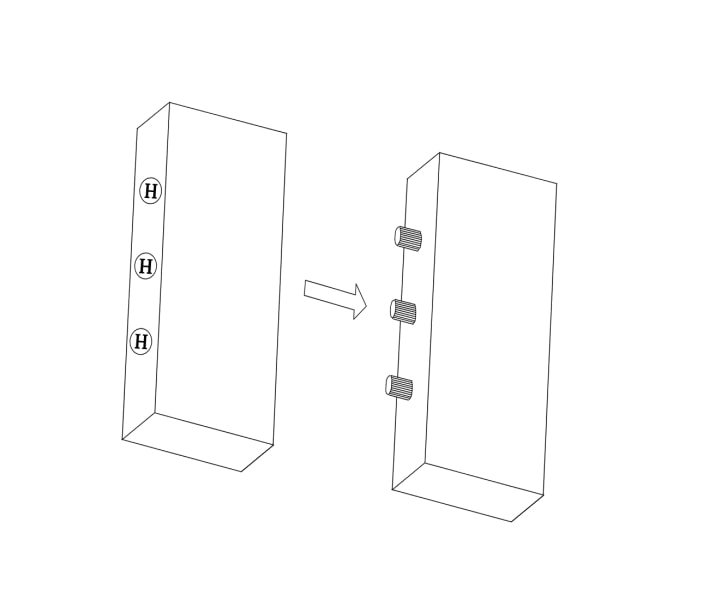
- Additionally, place two dowels at either end and centre-depth of the middle shelf, these should be equally distanced apart and about 1.5 to 2cms away from the edge.
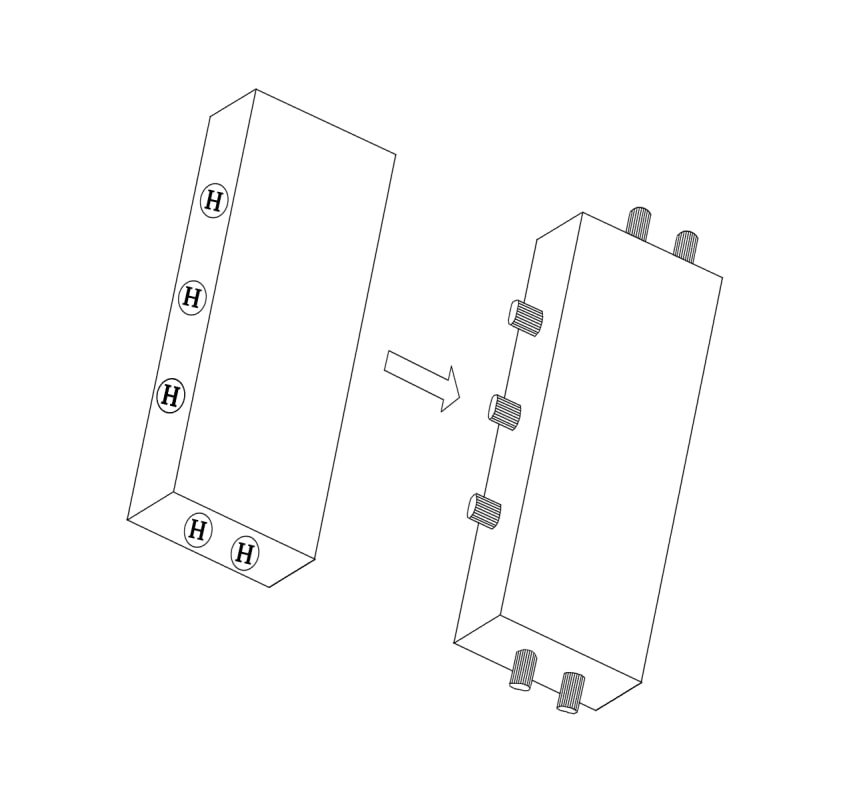
- These 4 dowels (2 at each end) will attach to the sideboards. Therefore, make sure the exposed part of the dowel(s) is shorter than the depth of the sideboards.
- Now, going back to the three dowels along the length of the middle shelf – we need to measure and mark their position on the backboard – use the pencilled outline of the middle shelf as a guide when marking these.
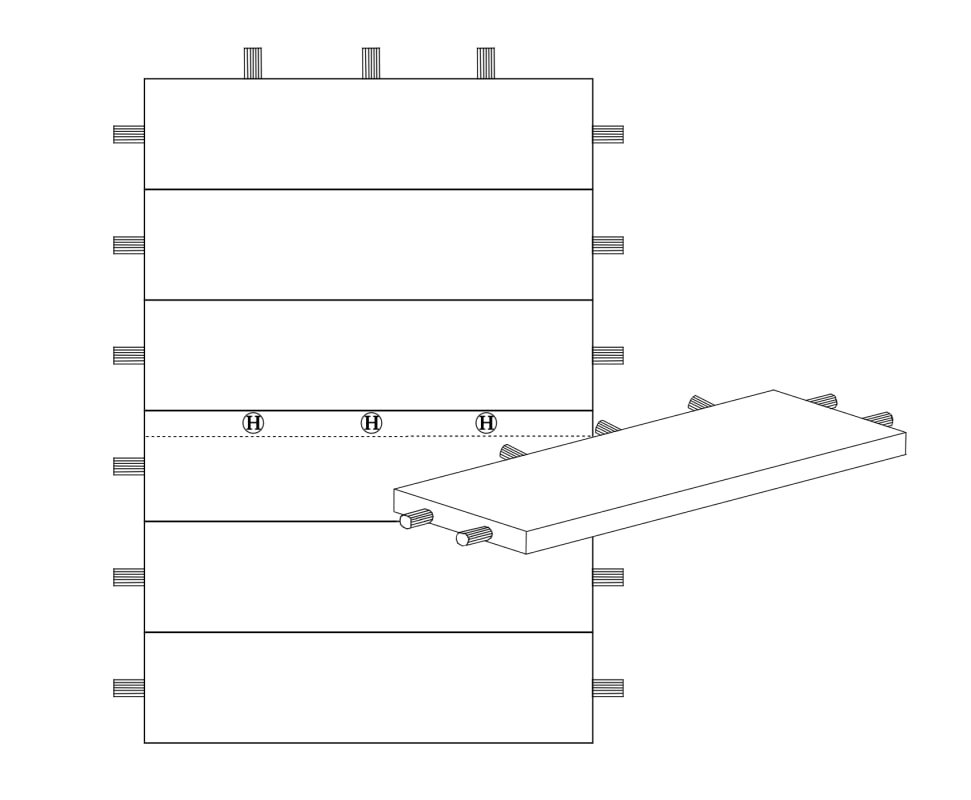
- Before drilling check the holes line up with the dowels, e.g. paint test. Then drill, and gently hammer the shelf into place:
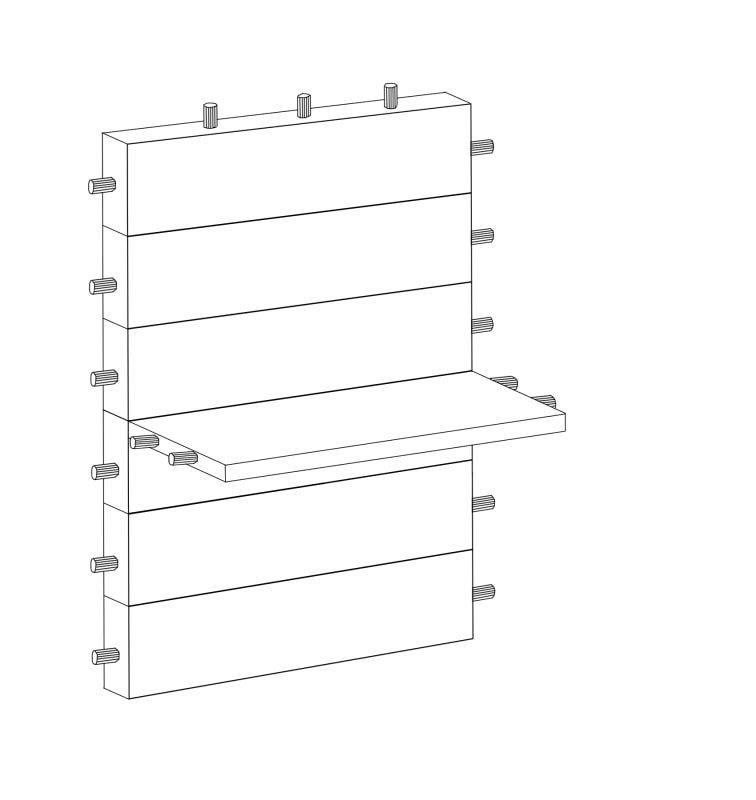
- Next, we’re going to do the bottom shelf. First, measure the depth of the backboard, and then draw its pencil outline across the surface of the bottom shelf – for this is where the backboard will sit. Then within this outline, mark three holes for the dowels. Make sure to space them equally apart and about 4cms from the edge:
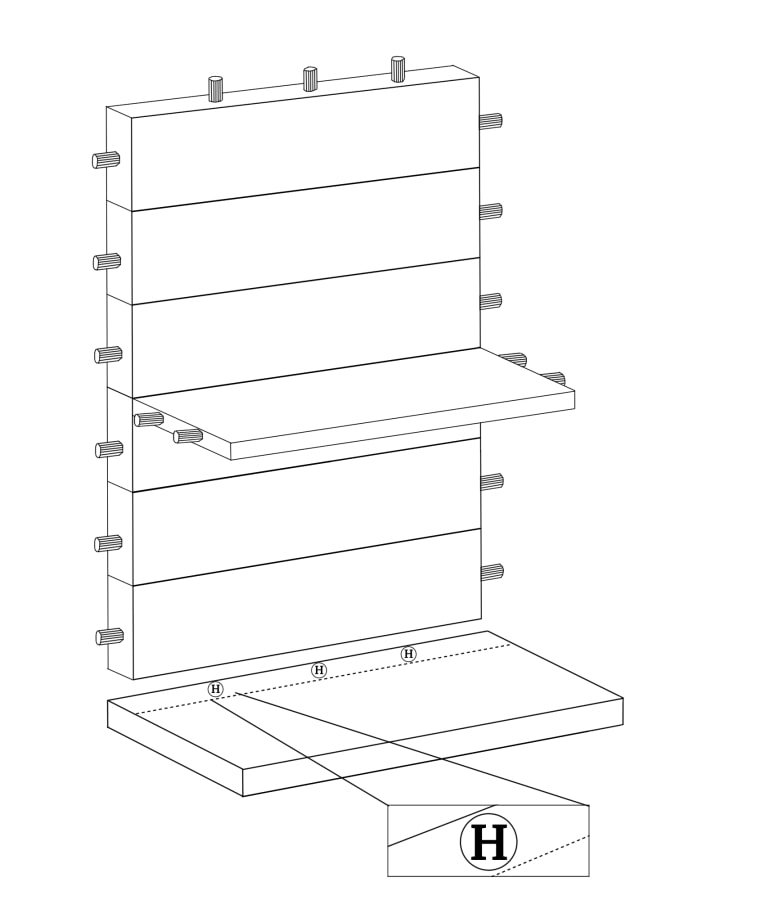
- Before drilling remember to take into account the depth of the bottom shelf – as you don’t want to drill straight through.
- Drill and gently hammer in three dowels – these will be left partly exposed in order to join with the backboard.
- Next, mark, drill and place two dowels along the depth and width of the bottom shelf – make sure to do both ends (four dowels in total) – these will attach the shelf to the sideboards. Ensure the dowels are at equal distance apart, and about 1.5 to 2cms from the edge. Again, the dowels should be partly exposed, but less than the depth of the sideboards.
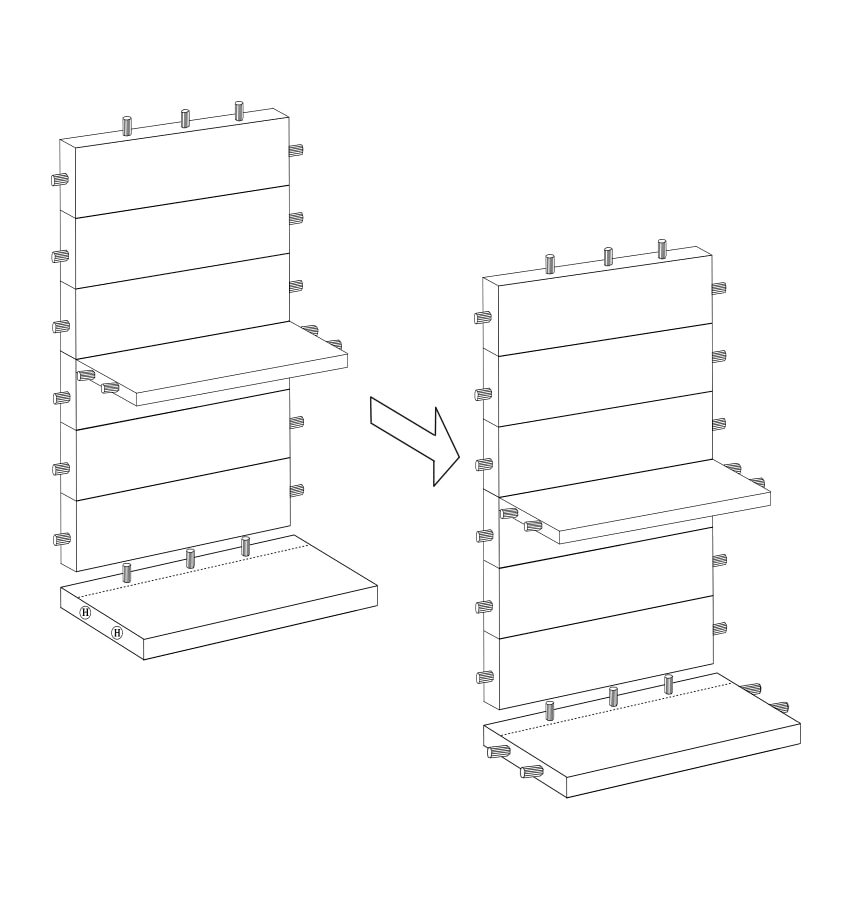
- Returning to the three dowels on the bottom shelf – measure their position and mark three corresponding holes along the bottom length and depth of the backboard. This is to help join them together.
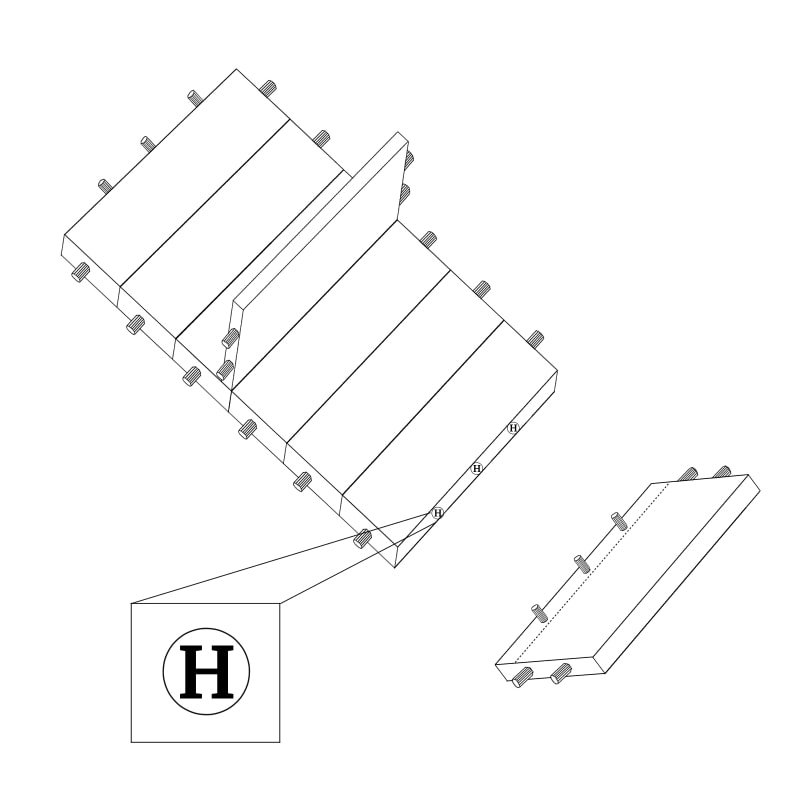
- Before drilling the holes, check for alignment (paint test). Then drill and gently hammer the bottom shelf and backboard together
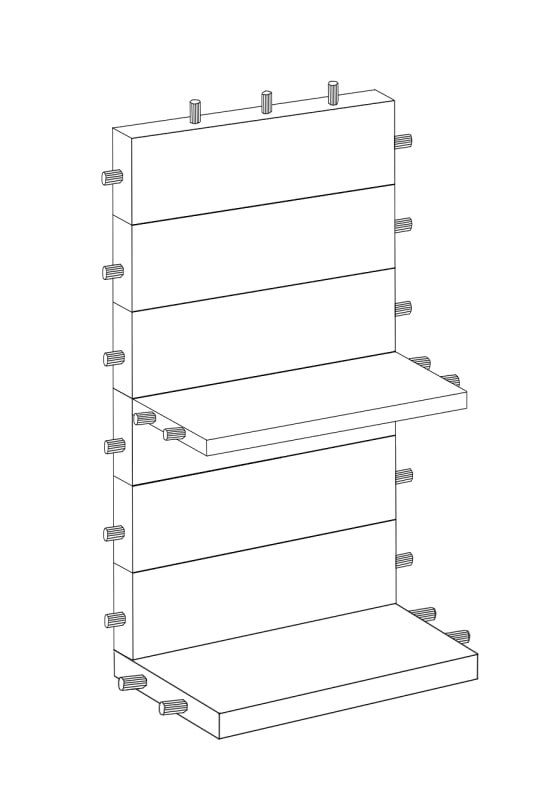
- Returning to the sideboards: at the top-end and depth of each sideboard, measure and mark the placement of two dowels. These should be 1.5 to 2cms from the edge. Drill and hammer these in place – don’t forget to leave the dowels partially exposed in order to join with the top shelf (but again make sure these are less than the depth of the top-shelf).
- Next, on the inside of the sideboards – measure and mark the position of the exposed dowels from the bottom and middle shelf, as well as the backboard (minus the three at the top).
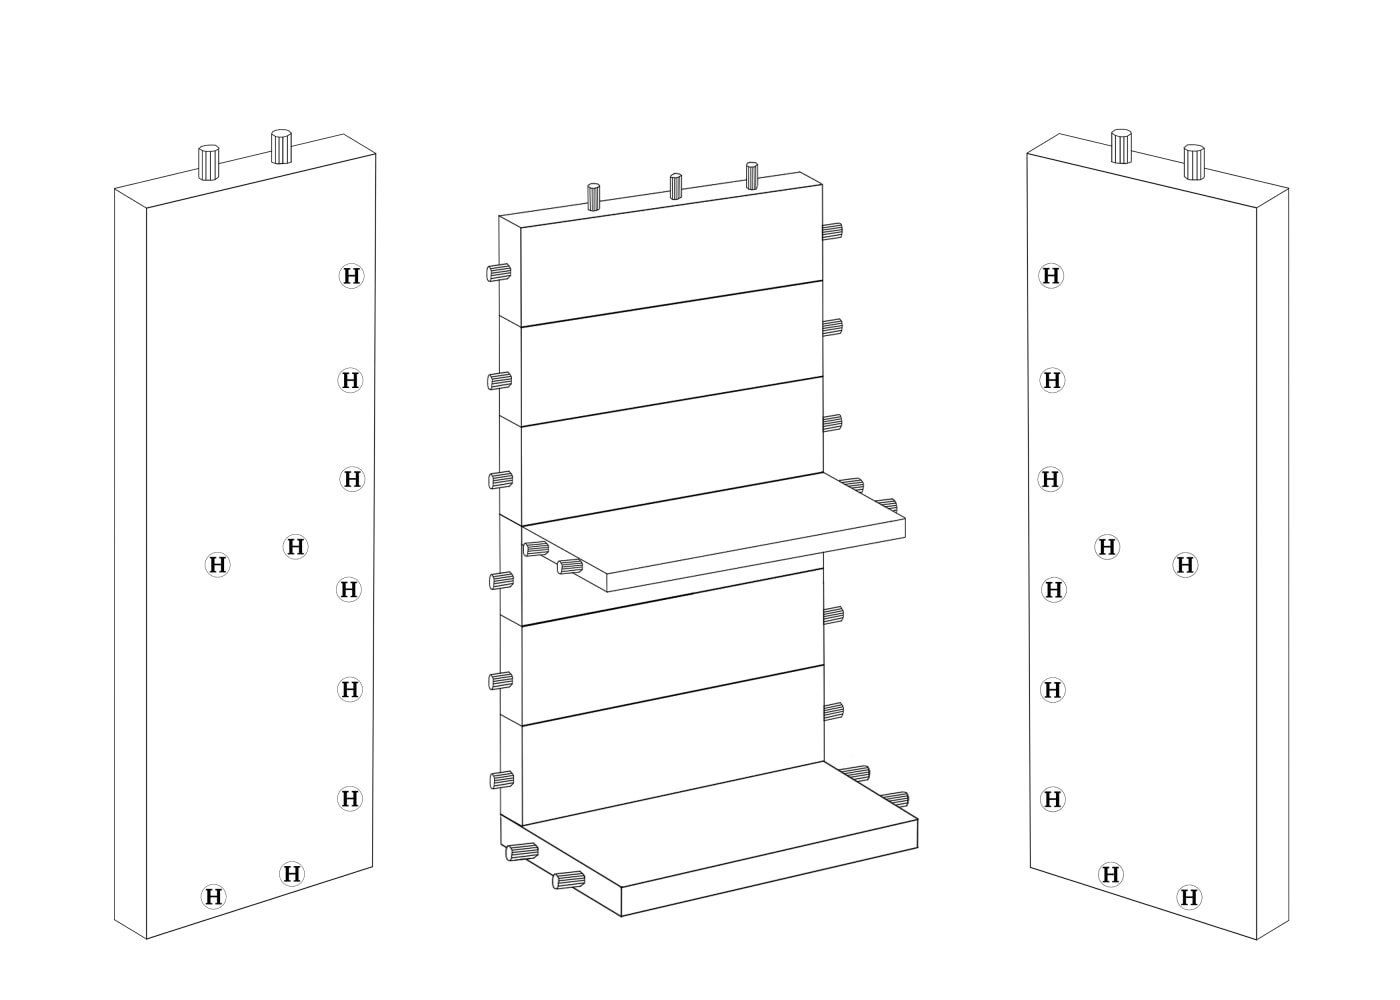
- Check the marks for the holes line up (paint test) and that the dowels don’t stick out further than the depth of the side-wood.
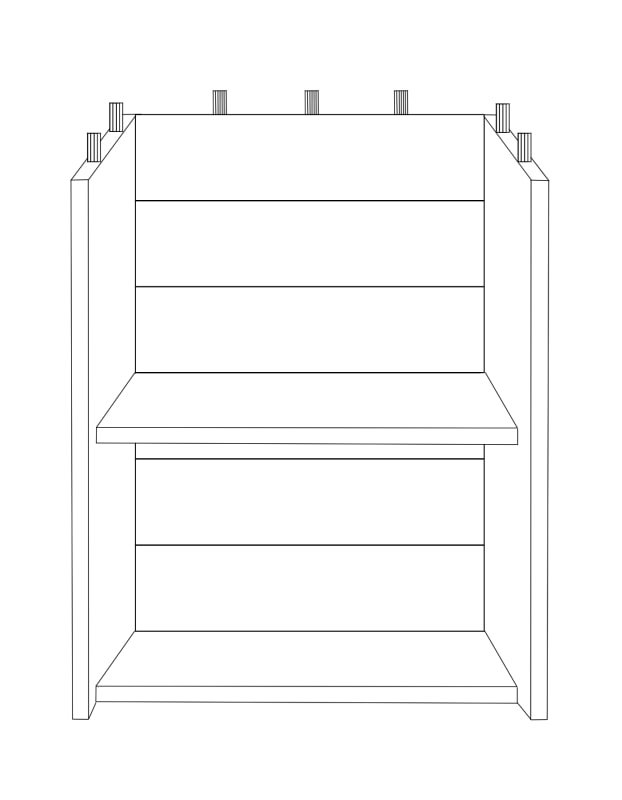
- Drill the holes, then gently hammer the sideboards into position. Tip – use a cloth between the hammer and the wood to stop any dents.
- Taking the top shelf:
- If you have any overhang – measure and mark this on the shelf. This will help provide a boundary to work within.
- Measure and mark where the dowels from the sideboards and backboards will meet with the top shelf:
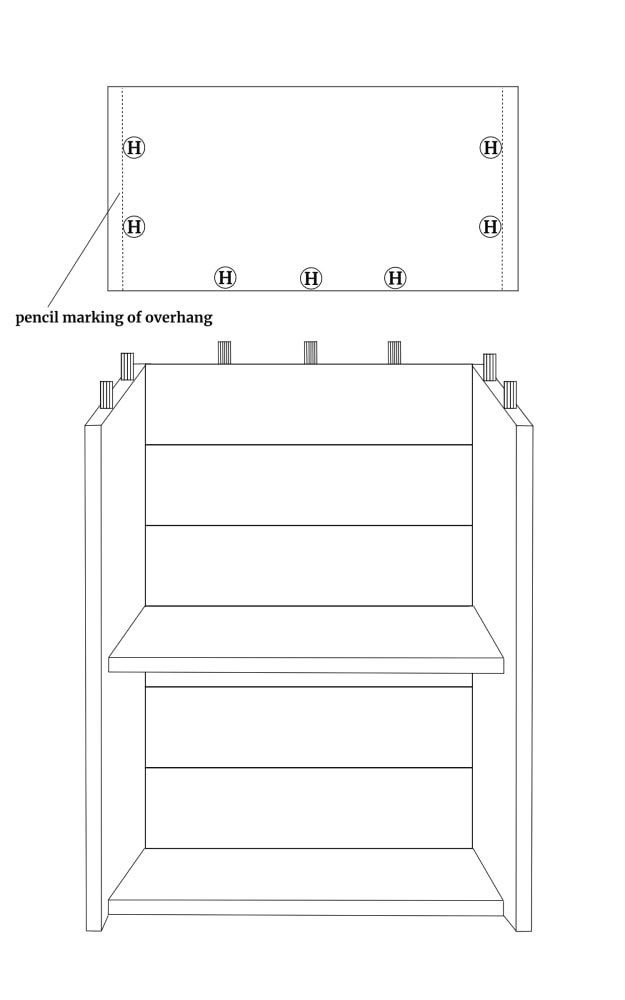
- Check the alignment (paint test) before drilling, and that the exposed dowels are less than the shelf’s depth. If so cut or sand these down. Once you’re happy with the dowels, drill the holes into the top shelf, but make sure not to go all the way through. Finally, gently hammer the top shelf on.
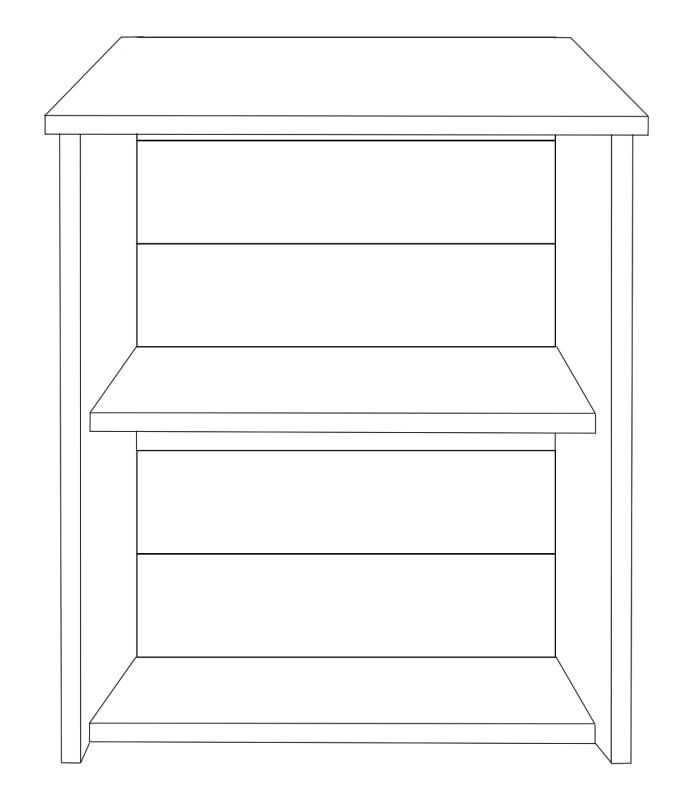
You now have one stylish bookcase.
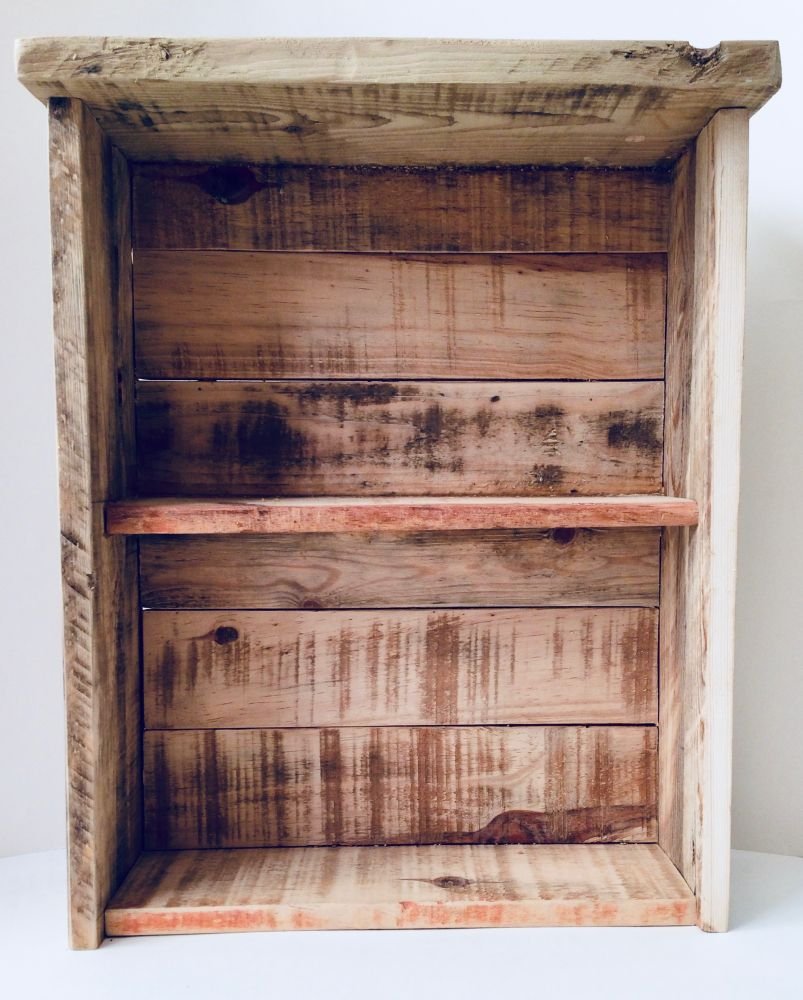
Congrats, you should now have your very own narrow bookcase.
Feel inspired? Or have your own how-to guide? We’d love to hear from you, send us your submission.

